
Windows: Workplace AI Install
Download Software
1
2
3
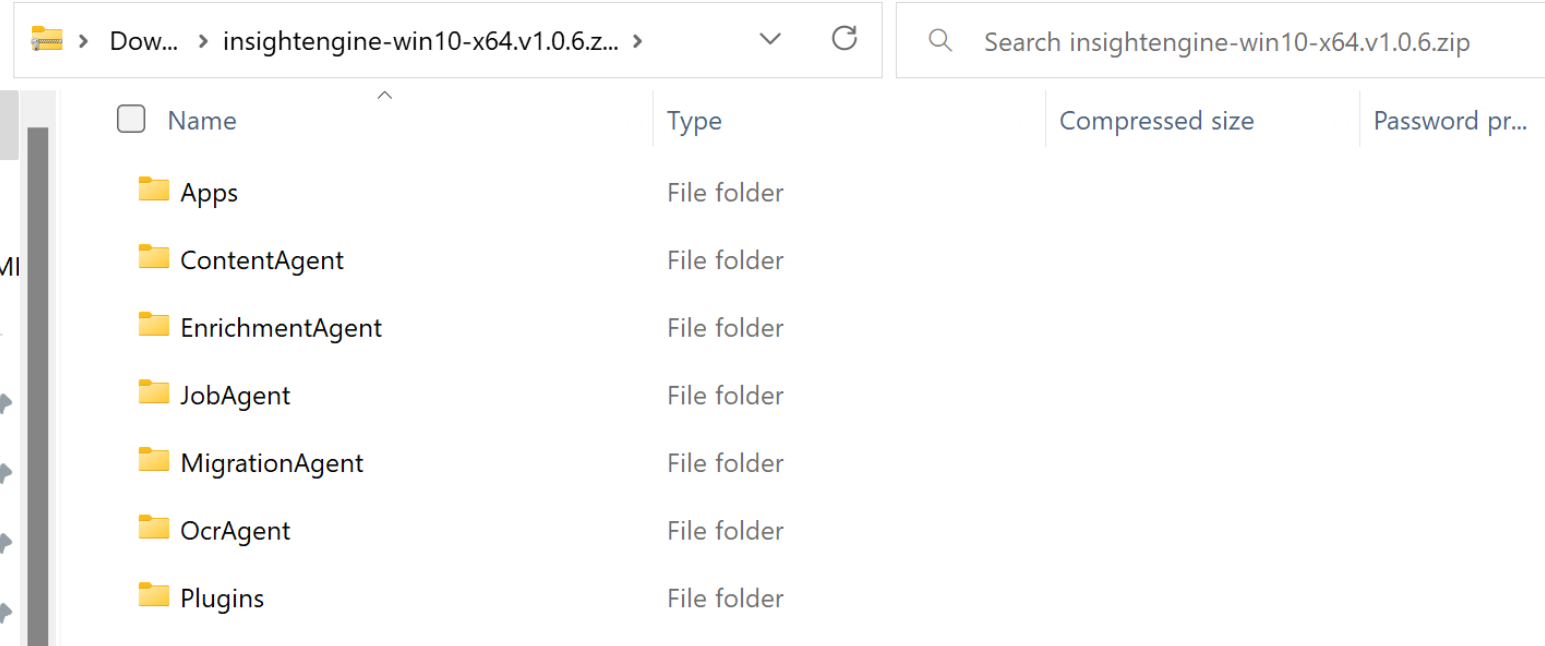
Expand-Archive -Force C:\Downloads\insightmaker-win*.zip C:\InsightMaker4
Start-BitsTransfer -Source "https://aka.ms/vs/17/release/vc_redist.x86.exe" -destination "C:\Downloads";
Start-BitsTransfer -Source "https://aka.ms/vs/17/release/vc_redist.x64.exe" -destination "C:\Downloads";
Start-BitsTransfer -Source "https://builds.dotnet.microsoft.com/dotnet/aspnetcore/Runtime/8.0.16/dotnet-hosting-8.0.16-win.exe" -destination "C:\Downloads"Prepare Files
1
gci C:\InsightMaker\Plugins\*.dll | Unblock-File;
gci C:\InsightMaker\Scripts\*.ps1 | Unblock-File
2
$Filename = "C:\InsightMaker\ContentAgent";
Copy-Item -Path "$filename\appsettings.default.json" -Destination "$filename\appsettings.json" -Force;
Copy-Item -Path "$filename\log4net.default.config" -Destination "$filename\log4net.config" -Force;

$Filename = "C:\InsightMaker\EnrichmentAgent";
Copy-Item -Path "$filename\appsettings.default.json" -Destination "$filename\appsettings.json" -Force;
Copy-Item -Path "$filename\log4net.default.config" -Destination "$filename\log4net.config" -Force;

$Filename = "C:\InsightMaker\JobAgent";
Copy-Item -Path "$filename\appsettings.default.json" -Destination "$filename\appsettings.json" -Force;
Copy-Item -Path "$filename\log4net.default.config" -Destination "$filename\log4net.config" -Force;

$Filename = "C:\InsightMaker\MigrationAgent";
Copy-Item -Path "$filename\appsettings.default.json" -Destination "$filename\appsettings.json" -Force;
Copy-Item -Path "$filename\log4net.default.config" -Destination "$filename\log4net.config" -Force;

$Filename = "C:\InsightMaker\OCRAgent";
Copy-Item -Path "$filename\appsettings.default.json" -Destination "$filename\appsettings.json" -Force;
Copy-Item -Path "$filename\log4net.default.config" -Destination "$filename\log4net.config" -Force;

$Filename = "C:\InsightMaker\SecurityAgent";
Copy-Item -Path "$filename\appsettings.default.json" -Destination "$filename\appsettings.json" -Force;
Copy-Item -Path "$filename\log4net.default.config" -Destination "$filename\log4net.config" -Force;

$Filename = "C:\InsightMaker\SourceAgent";
Copy-Item -Path "$filename\appsettings.default.json" -Destination "$filename\appsettings.json" -Force;
Copy-Item -Path "$filename\log4net.default.config" -Destination "$filename\log4net.config" -Force;
3
$Filename = "C:\InsightMaker\Apps\Admin\Api";
Copy-Item -Path "$filename\appsettings.default.json" -Destination "$filename\appsettings.json" -Force;
Copy-Item -Path "$filename\log4net.default.config" -Destination "$filename\log4net.config" -Force;
Copy-Item -Path "$filename\web.default.config" -Destination "$filename\web.config" -Force

$Filename = "C:\InsightMaker\Apps\Admin\app";
Copy-Item -Path "$filename\web.default.config" -Destination "$filename\web.config" -Force;

$Filename = "C:\InsightMaker\Apps\search\api";
Copy-Item -Path "$filename\appsettings.default.json" -Destination "$filename\appsettings.json" -Force;
Copy-Item -Path "$filename\log4net.default.config" -Destination "$filename\log4net.config" -Force;
Copy-Item -Path "$filename\web.default.config" -Destination "$filename\web.config" -Force;

$Filename = "C:\InsightMaker\Utils\InsightMaker.IndexUtilities";
Copy-Item -Path "$filename\appsettings.default.json" -Destination "$filename\appsettings.json" -Force;
Copy-Item -Path "$filename\log4net.default.config" -Destination "$filename\log4net.config" -Force;

$Filename = "C:\InsightMaker\Utils\InsightMaker.Security.BuiltinSecurityUtilities";
Copy-Item -Path "$filename\appsettings.default.json" -Destination "$filename\appsettings.json" -Force;
Copy-Item -Path "$filename\log4net.default.config" -Destination "$filename\log4net.config" -Force;Aiimi Insight Configurations
1
cd C:\InsightMaker\Utils\InsightMaker.SettingsUtilities;
.\InsightMaker.SettingsUtilities.exe patch -i C:\InsightMaker\ -a "elastic.certificate.path" -v "C:\Apps\certs\elastic-stack-ca.p12";
.\InsightMaker.SettingsUtilities.exe patch -i C:\InsightMaker\ -a "elastic.certificate.password" -v "Text input";
.\InsightMaker.SettingsUtilities.exe patch -i C:\InsightMaker\ -a "elastic.password" -v "Text input";
.\InsightMaker.SettingsUtilities.exe patch -i C:\InsightMaker\ -a "elastic.prefix" -v "Text input";
.\InsightMaker.SettingsUtilities.exe patch -i C:\InsightMaker\ -a "elastic.server" -l "https://localhost:9200";
.\InsightMaker.SettingsUtilities.exe patch -i C:\InsightMaker\ -a "plugins.locations" -l "C:\InsightMaker\Plugins"
.\InsightMaker.SettingsUtilities.exe patch -i C:\InsightMaker\ -a "remoteApi.certificate.path" -v "C:\Apps\certs\elastic-certificates.p12";
.\InsightMaker.SettingsUtilities.exe patch -i C:\InsightMaker\ -a "remoteApi.RemoteAddress" -v "https://localhost";
.\InsightMaker.SettingsUtilities.exe patch -i C:\InsightMaker\Apps\Admin\api -a "remoteApi.RemoteAddress" -v "https://localhost/admin/api";
.\InsightMaker.SettingsUtilities.exe patch -i C:\InsightMaker\Apps\Search\api -a "remoteApi.RemoteAddress" -v "https://localhost/api";
.\InsightMaker.SettingsUtilities.exe patch -i C:\InsightMaker\ -a "remoteApi.certificate.password" -v "Text input";
.\InsightMaker.SettingsUtilities.exe patch -c -i C:\InsightMaker\ -a "licenseKey" -v "Text input";
.\InsightMaker.SettingsUtilities.exe patch -c -i C:\InsightMaker\ -a "licenseSig" -v "Text input";Json Web Token Config
1
Configure Log File Storage
1
2
Initialise Control Hub Parameter
1
Agent Services
1
Update Descriptions
1
Install Tika
1
2
3
4
5
6
7
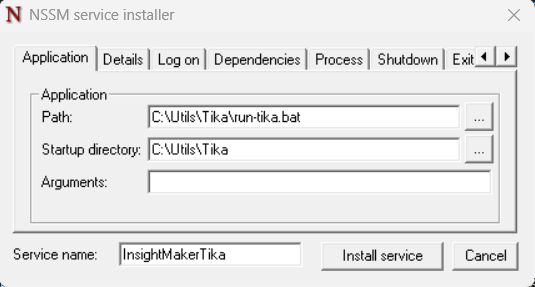
8
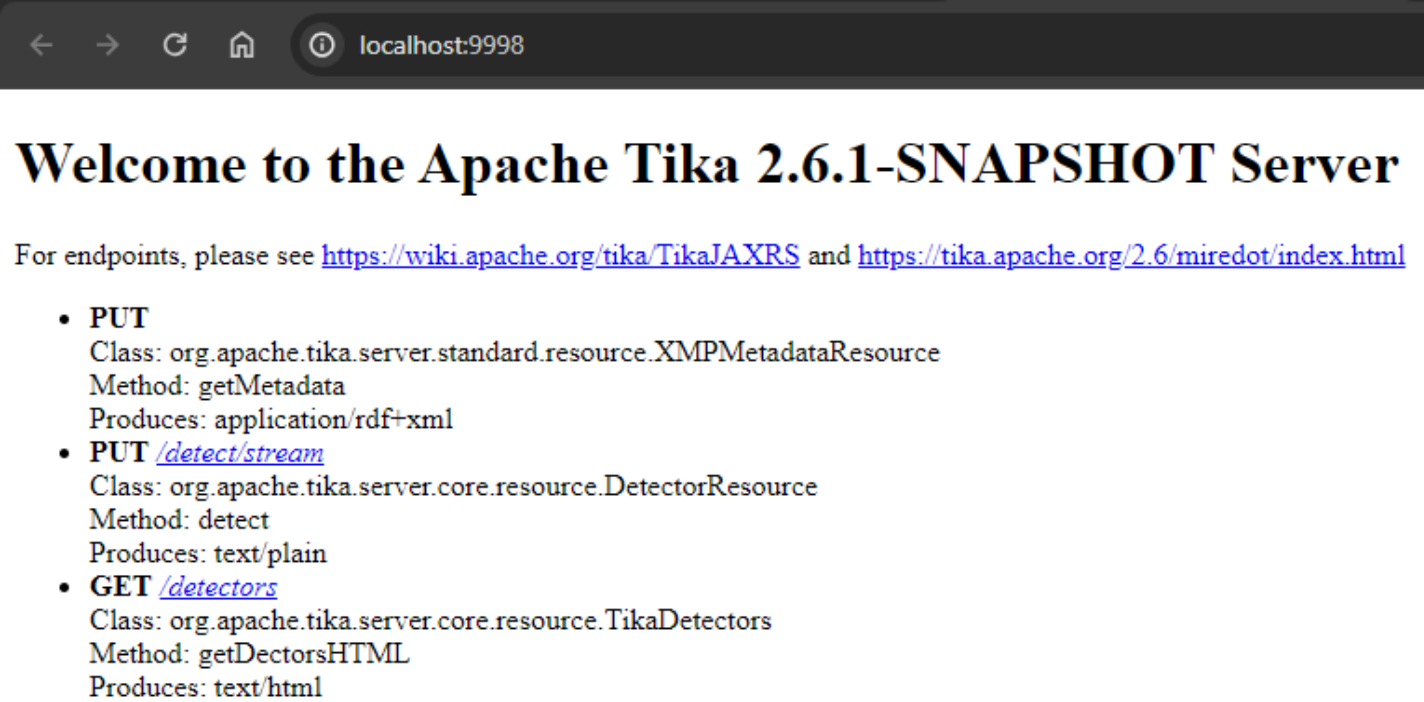
Check Tika Services
1
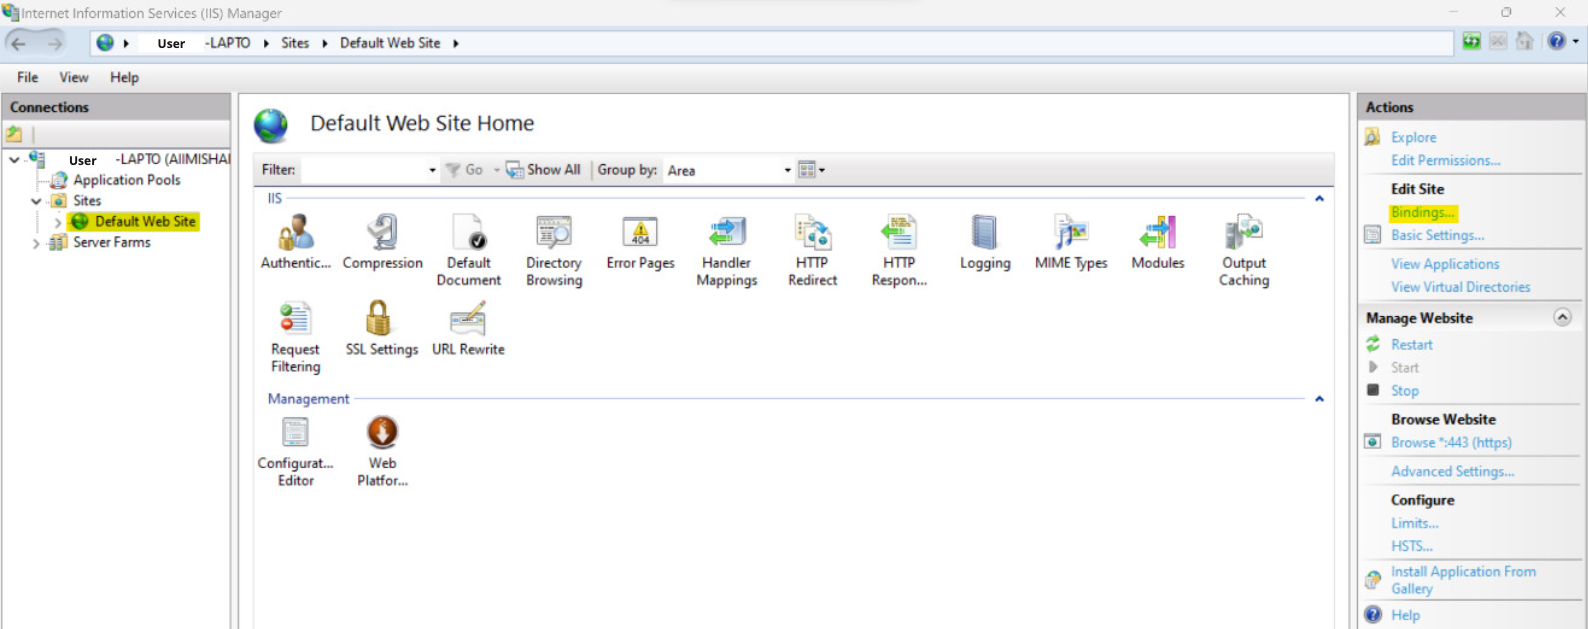
IIS Configuration
1
2
3
IIS Application Pools Setup
1
2
IIS Assign Certificate to Binding
1
2
3
4
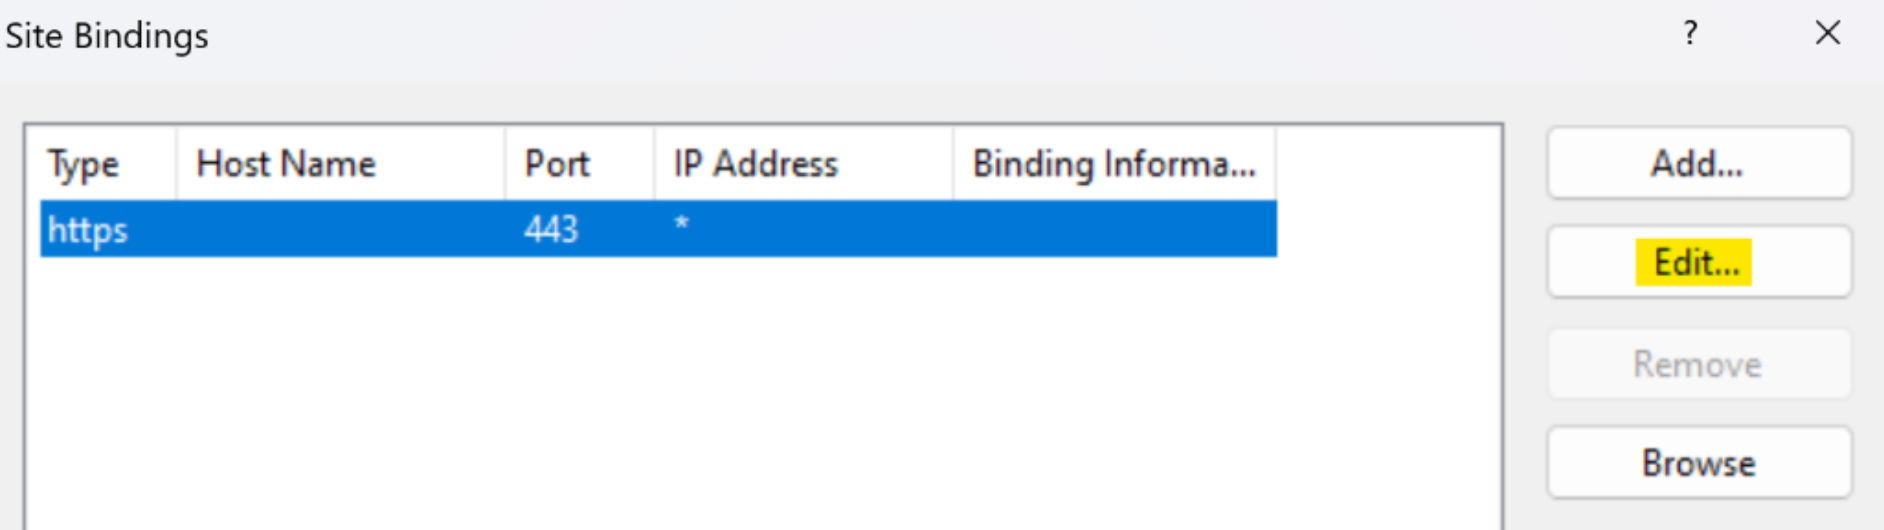
5
6
Password Encryption
Restart Agent Services
1
Accessing Control Hub
1
2
3
Installing OData API (Optional)
1
2
3
4
5
6
7
8
9
10
11
12
13
14
15
16
Last updated