
Elastic and Kibana Install (Windows)
This guide walks you through setting up a single node Elasticsearch cluster and Kibana instance. It should take around 2 hours to complete the Elastic and Kibana install.
If you are setting up a production environment, you will want to set up an Elasticsearch cluster. Please use the Elasticsearch website for more information on how to do this.
Folder Structure Set Up
The Elasticsearch and Kibana install need a specific folder structure. You can create this yourself or use a PowerShell query.
You can choose the drive you want to use. We do recommend these are in the root of the folder. This guide will assume you are using the C:\ drive.
C:\Apps
C:\InsightMaker
C:\Downloads
C:\Utils
PowerShell Query
Open PowerShell as an Admin.
Run the following script.
Check the storage path in this script before running it. For example: (C:).
Download Software
Download and save the InsightEngine zip file from GitHub in to your new Downloads folder.
If you do not have access to this reach out to your Aiimi contact.
Run the following script in an Admin PowerShell to download any additional software needed
Check the storage path and release names match the required versions. For example: (C:), (elasticsearch-8.17.3).
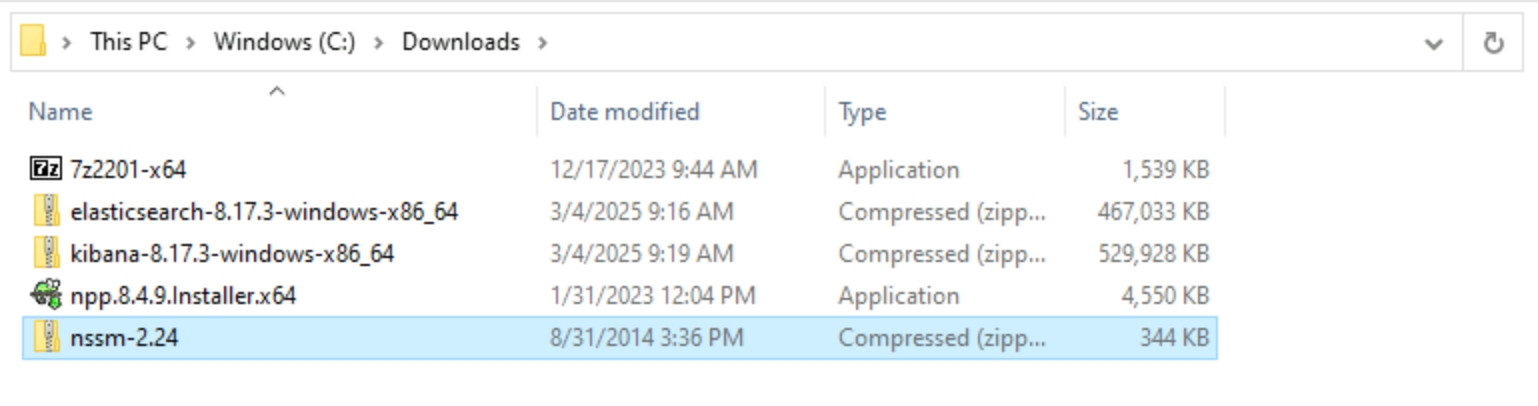
Go to your downloads folder and check everything has downloaded.
7-Zip
Elasticsearch
Kibana
Notepad ++
NSSM
Extract Software
Extract 4 of the zip files by running the following script in an Admin PowerShell.
Check the storage path and release names match the required versions. For example: (C:), (elasticsearch-8.17.3).
Check each file has extracted to the correct location.
Elasticsearch is in the Apps folder.
Kibana is in the Apps folder.
NSSM is in the Utils folder.
There should be 13 folders within the Insight Maker folder.
Configure Elastic
You need to update a few configurations in the Elastic config file. It ensures the necessary paths match your system.
Run the following script in an Admin PowerShell to update these.
Check the storage path and release names match the required versions. For example: (C:), (elasticsearch-8.17.3).
Install Elastic
Close your previous PowerShell window to avoid confusion.
Open a new Admin PowerShell.
Run the following script to Install Elastic as a service.
Check the storage path and release names match the required versions. For example: (C:), (elasticsearch-8.17.3).
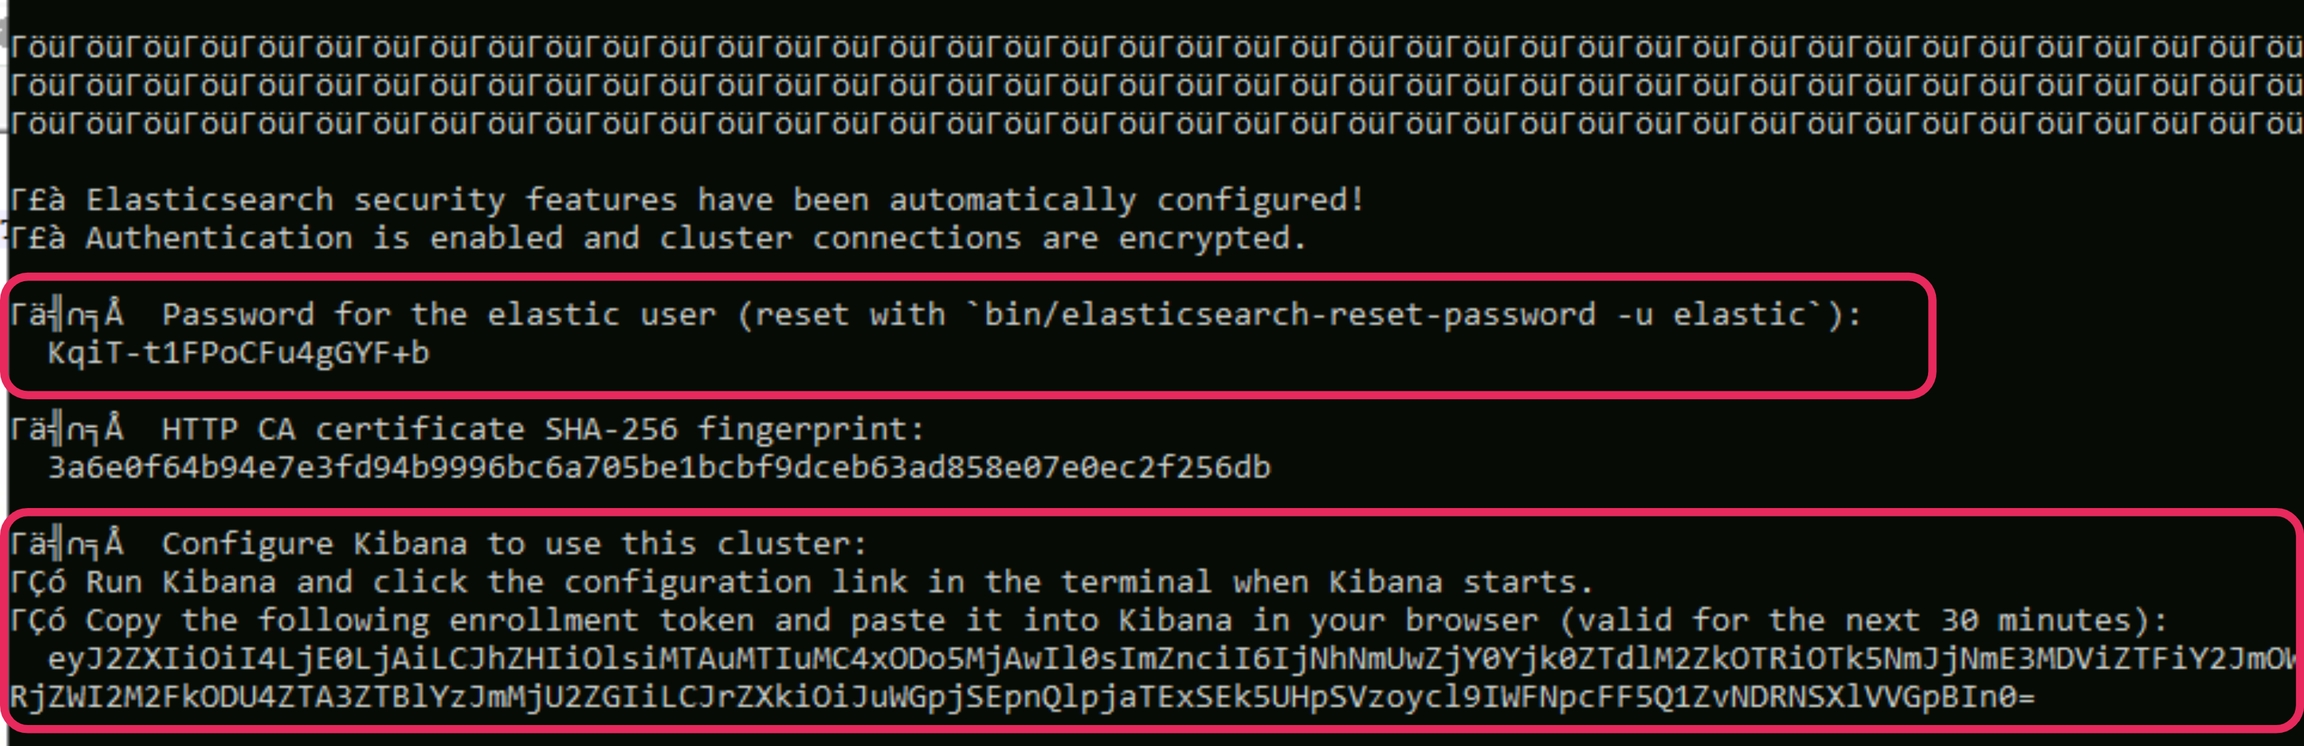
Do not close PowerShell when this script has finished.
This will return a password for Elastic. Make a note of this for later.
It will also return a token needed for the Kibana install. Make a note of this for later.
Test Install
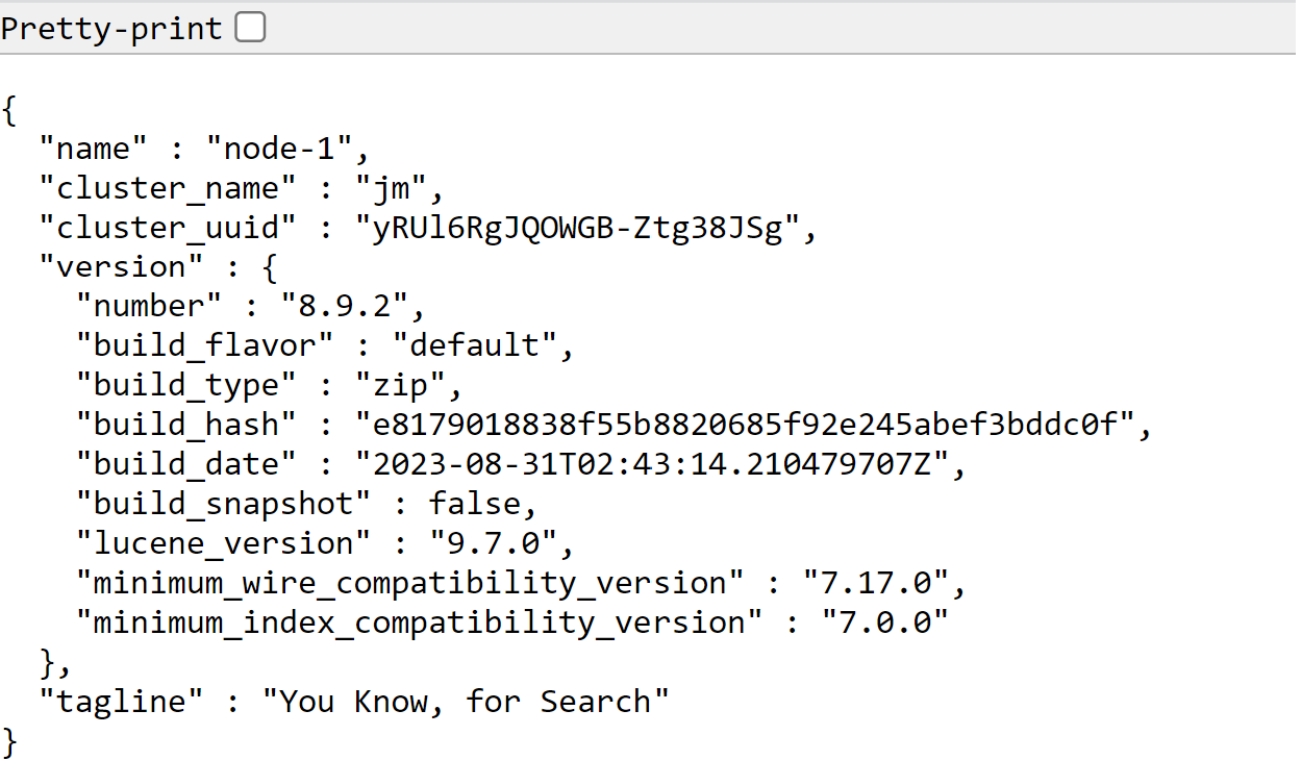
Open your web browser and navigate to https://localhost:9200.
Login with the username 'elastic' and the password you got from PowerShell.
If this was successful it will show a block of code that contains build details. These should include, Name, Cluster_uuid, Build_flavour, etc.
Install Kibana
Open a new Admin PowerShell window.
Do not close the previous window.
Run the following script to Install Kibana.
Check the storage path and release names match the required versions. For example: (C:), (kibana-8.17.3).
Do not close PowerShell when this script has finished.
Once this has finished running a URL will appear. In your browser, Navigate to that URL.
Copy the enrolment token you got from the Elastic PowerShell.
Paste it into the Enrolment token in the Kibana session.
Select Configure Elastic.
The configuration may not complete. That's not an issue at this point.
In your web browser, navigate to http://localhost:5601.
Use the Elastic credentials you used earlier to login.
Update Elastic License
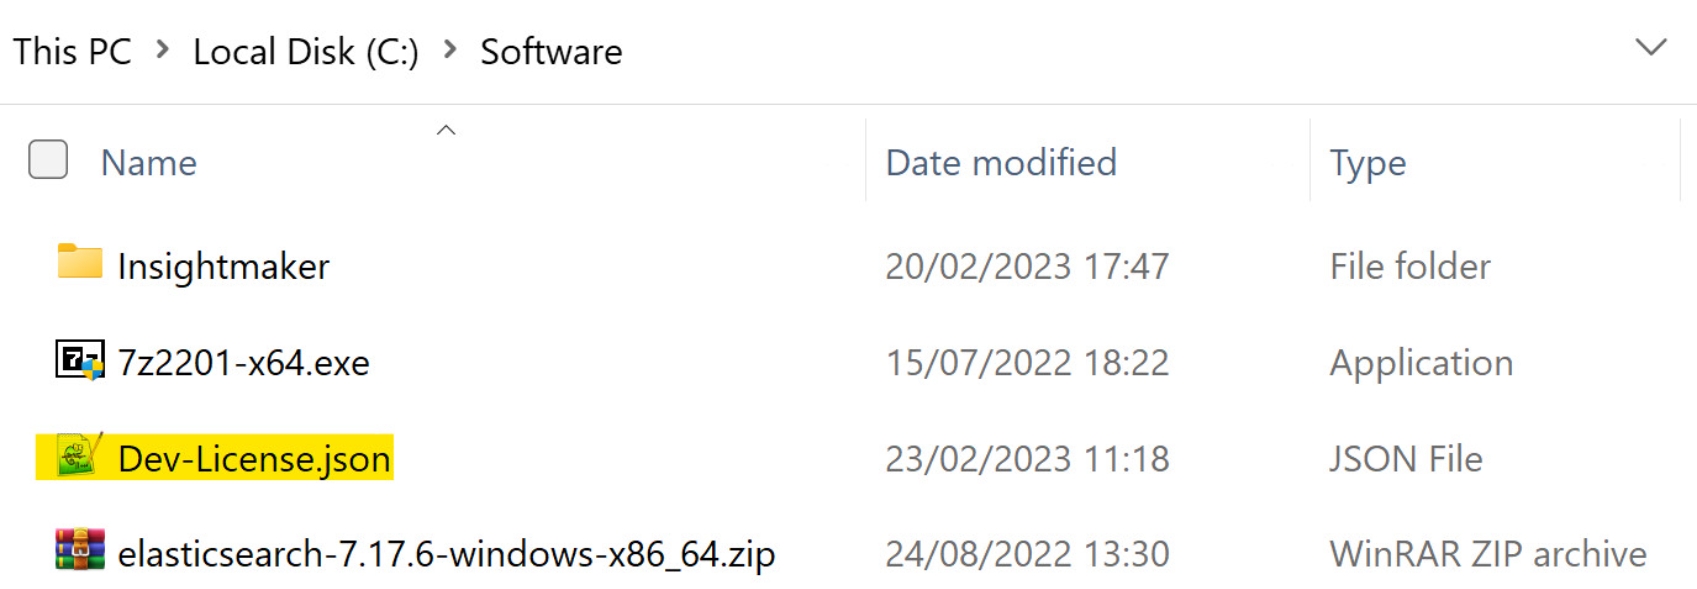
Copy the text of your Elastic license into a Notepad++ file.
Save this as 'Dev-license.json' in the root folder.
Within http://localhost:5601 navigate to the Management tab on the left.
Select Elastic License Management.
Upload the Dev-license.json file via the license manager.
It is normal for this to cause an access issue in Kibana. If it doesn't, check Elastic isn't already installed in 'Programs and Features'. Remove it if it is there.
Create Elastic Certificate
Open another new PowerShell as an Admin.
This should be the third PowerShell you have open.
Create the CA Cert
Run the following script to create an Elastic ca cert.
Check the storage path and release names match the required versions. For example: (C:), (elasticsearch-8.17.3).
When prompted for an output file, leave this empty and press Enter.
If asked if you want to overwrite the existing file, type Y and press enter.
When prompted for the CA password enter a secure password.
This password cannot include any special characters.
Create the Certificate
Run the following script to create an Elastic certificate.
Check the storage path and release names match the required versions. For example: (C:), (elasticsearch-8.17.3).
When prompted enter the CA password you created.
When prompted for an output file, leave this empty and press Enter.
When prompted enter a password for this certificate and press enter
This password cannot include any special characters. For added security this should be different to the CA password.

Copy Certificates
Run the following script to create a new folder and move the certificates to it.
Check the storage path and release names match the required versions. For example: (C:), (elasticsearch-8.17.3).
Secure Connection Configuration
A few configurations need updating to use Xpack security. This improves the security between Kibana and Elastic.
Run the following script to make these changes.
Check the storage path and release names match the required versions. For example: (C:), (elasticsearch-8.17.3).
Setup Elastic Keystore
The certificate password needs updating in a few places to match your new password.
Run the following script to update the transport keystore password.
Check the storage path and release names match the required versions. For example: (C:), (elasticsearch-8.17.3).
If asked if you want to overwrite the existing file, type Y and press enter.
When prompted enter the Certificate password you created and press enter.
Be careful when you enter your password, as it does not show what you have entered.
Run the following script to update the transport truststore password.
If asked if you want to overwrite the existing file, type Y and press enter.
When prompted enter the Certificate password you created and press enter.
Be careful when you enter your password, as it does not show what you have entered.
Run the following script to update the http keystore password.
If asked if you want to overwrite the existing file, type Y and press enter.
When prompted enter the Certificate password you created and press enter.
Be careful when you enter your password, as it does not show what you have entered.
Run the following script to update the http truststore password.
When prompted enter the Certificate password you created and press enter.
Be careful when you enter your password, as it does not show what you have entered.
Configure Secure Connection
Run the following script to update the verification mode in the kibana.yml file.
Check the storage path and release names match the required versions. For example: (C:), (kibana-8.17.3).
You can now close the PowerShell consoles you have open.
Within each console press Ctrl + C to end the session.
It will ask if you want to terminate the session. Enter Y to confirm.

Install Elastic Service
Open PowerShell as an Admin.
Run the following command to install the Elastic service.
Check the storage path and release names match the required versions. For example: (C:), (elasticsearch-8.17.3).
Run the following command to start the Elastic service.
Check the storage path and release names match the required versions. For example: (C:), (elasticsearch-8.17.3).
Open your web browser and navigate to https://localhost:9200.
This may take a few minutes to load for the first time.
Login using your Elastic credentials.
Install Kibana Service
Run the following script to install the Kibana Service.
Check the storage path and release names match the required versions. For example: (C:), (nssm-2.24).
Select the browse (...) button in the top field.
Navigate to Apps > Kibana > Bin and select Kibana.
Select Install Service.
Run the following script to start the Kibana service.
Check the storage path and release names match the required versions. For example: (C:), (nssm-2.24).
Open your web browser and navigate to http://localhost:5601.
This may take a few minutes to load the first time.
Login using your Elastic credentials.