Final Search Flow
You will now need to create 1 more search flow to allow all of this to work for Search. This search flow has a few specific requirements but otherwise is set up like any other.
For support creating a search flow see our guide on creating a new search flow.
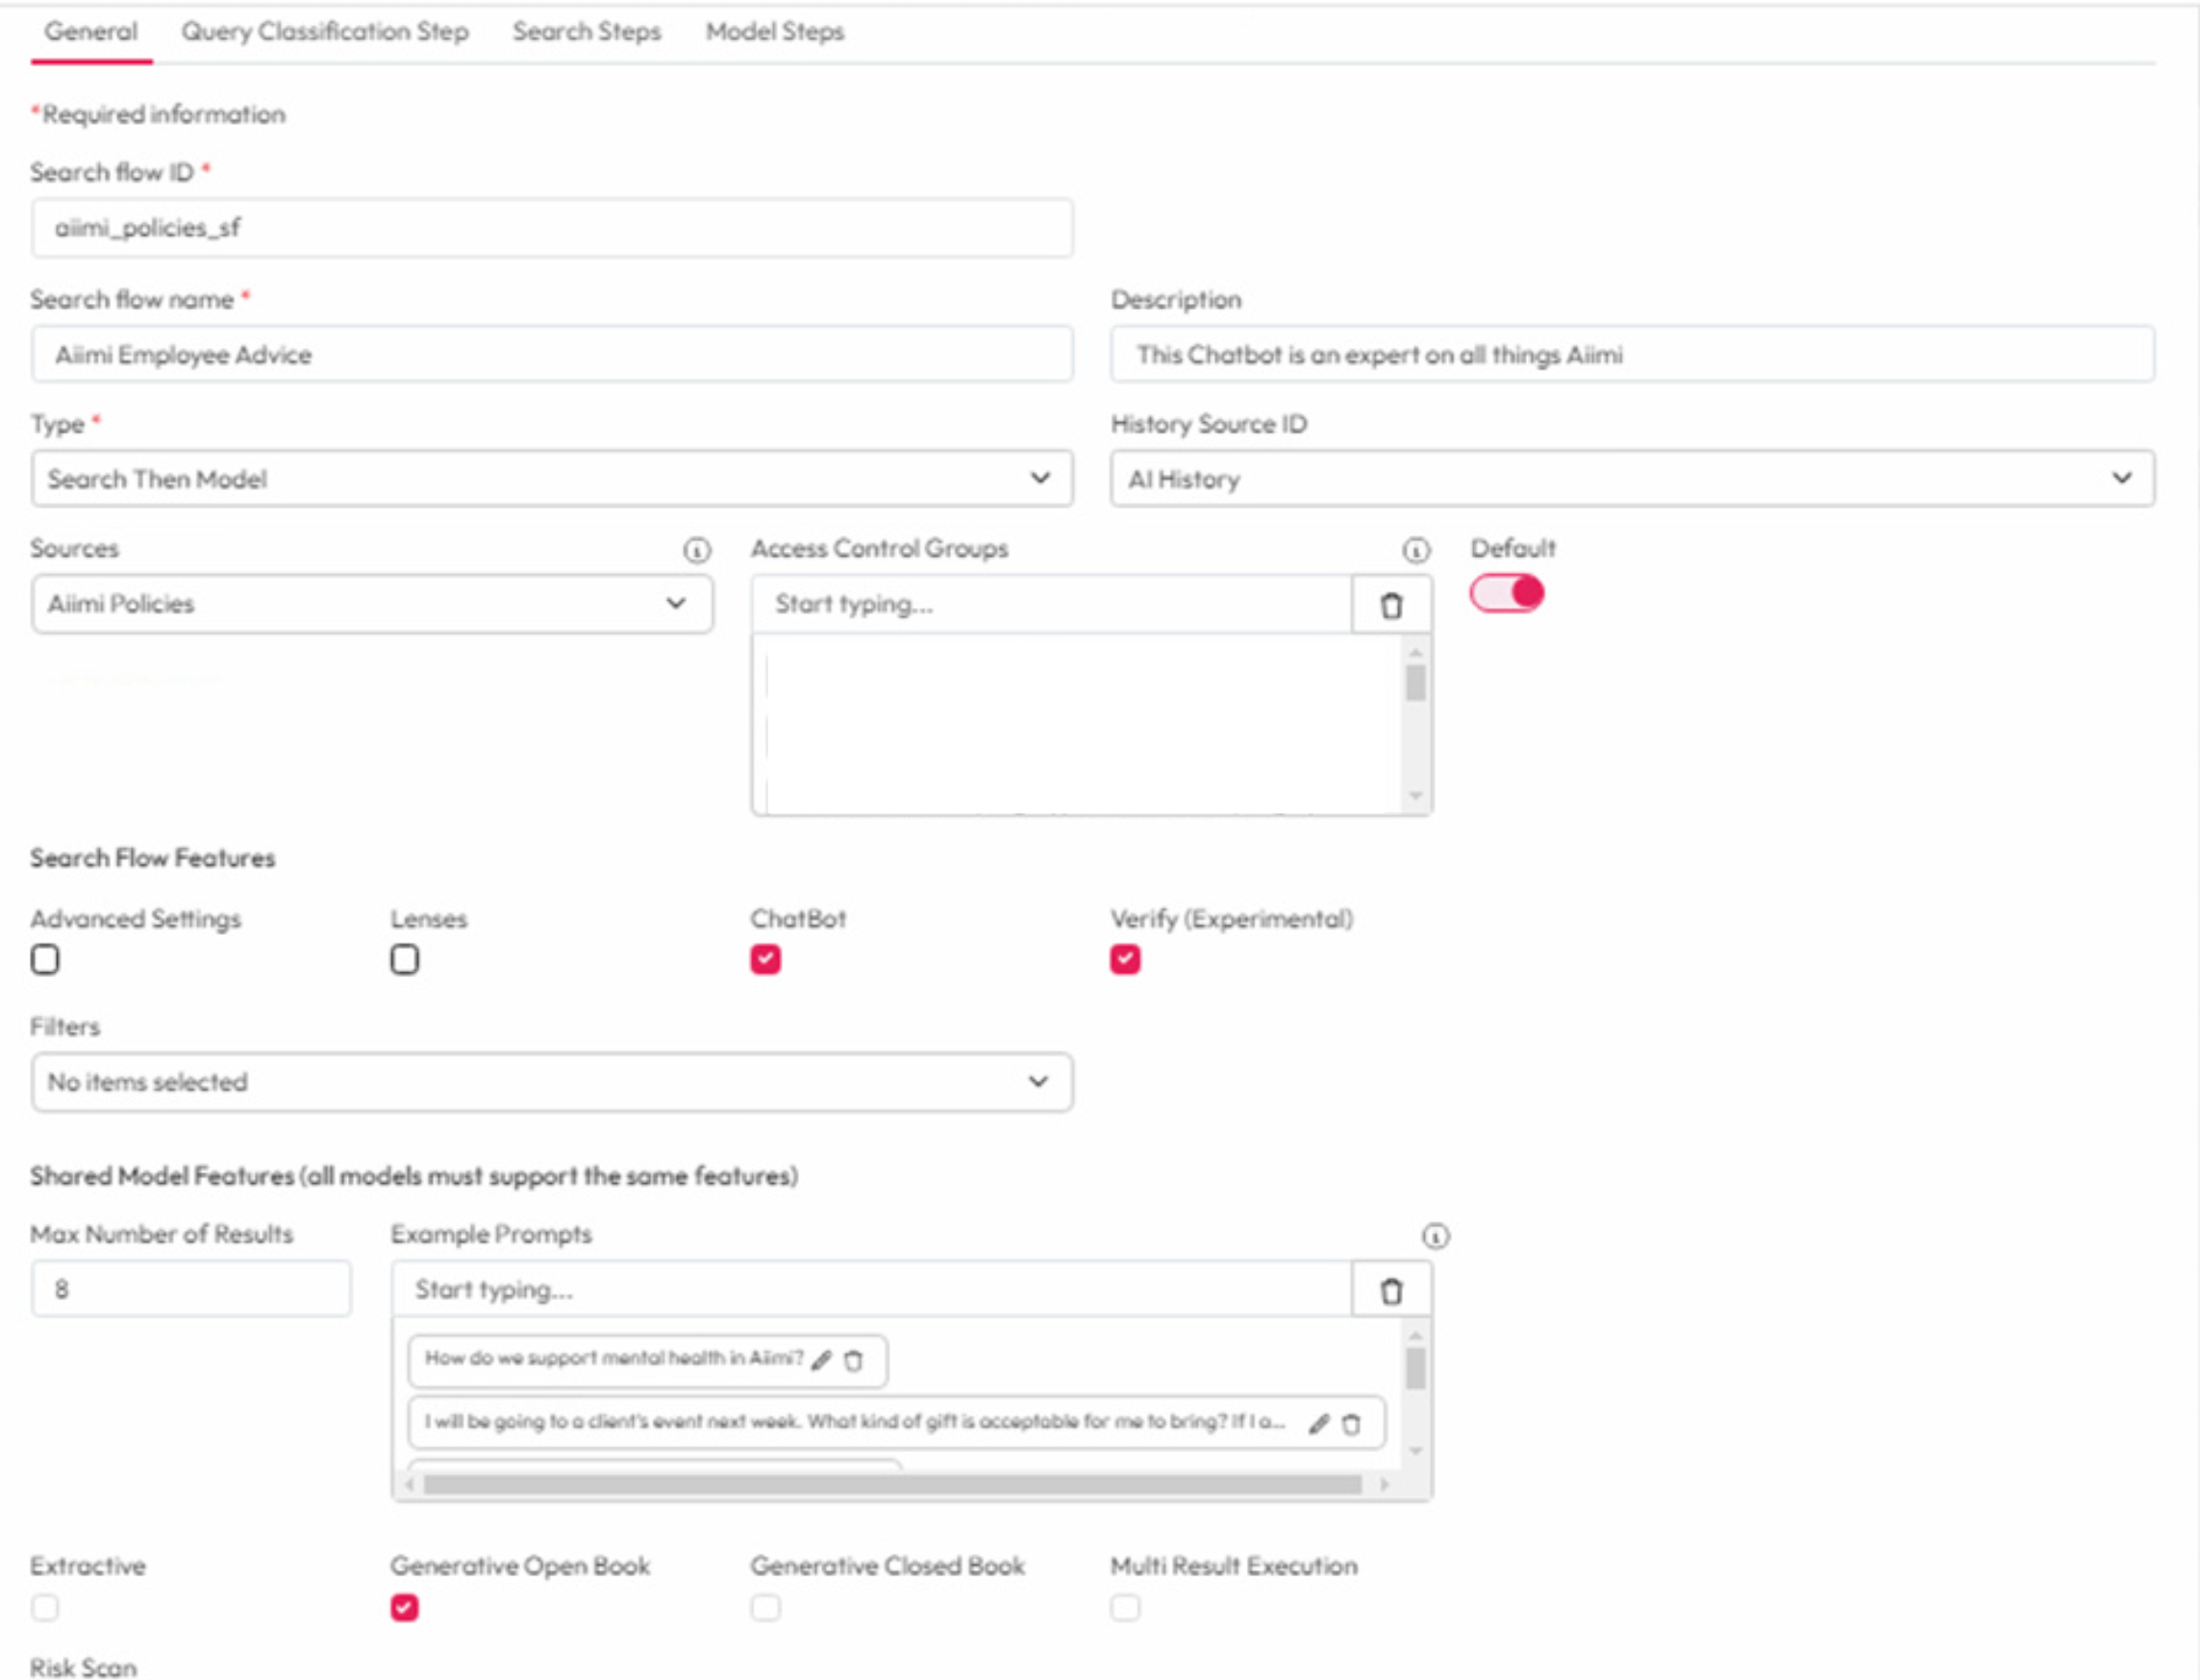
General
Type: Select "Search Then Model" from the dropdown
Search Flow Features: Check "Lenses" and "Chatbot".
These determine where this search flow can be used.
Filters: Select any filters that should be applied as part of this search flow.
These filters effect the apps differently.
In Lenses, they override the general config and provide users a more curated list of filters to use.
In Chatbot, the default is no filters are visible. This list will make the chosen filters visible instead.
Max number of results: Enter the number of top results that are passed to the model during the Model Step.
Generative Open Book: This must be checked.

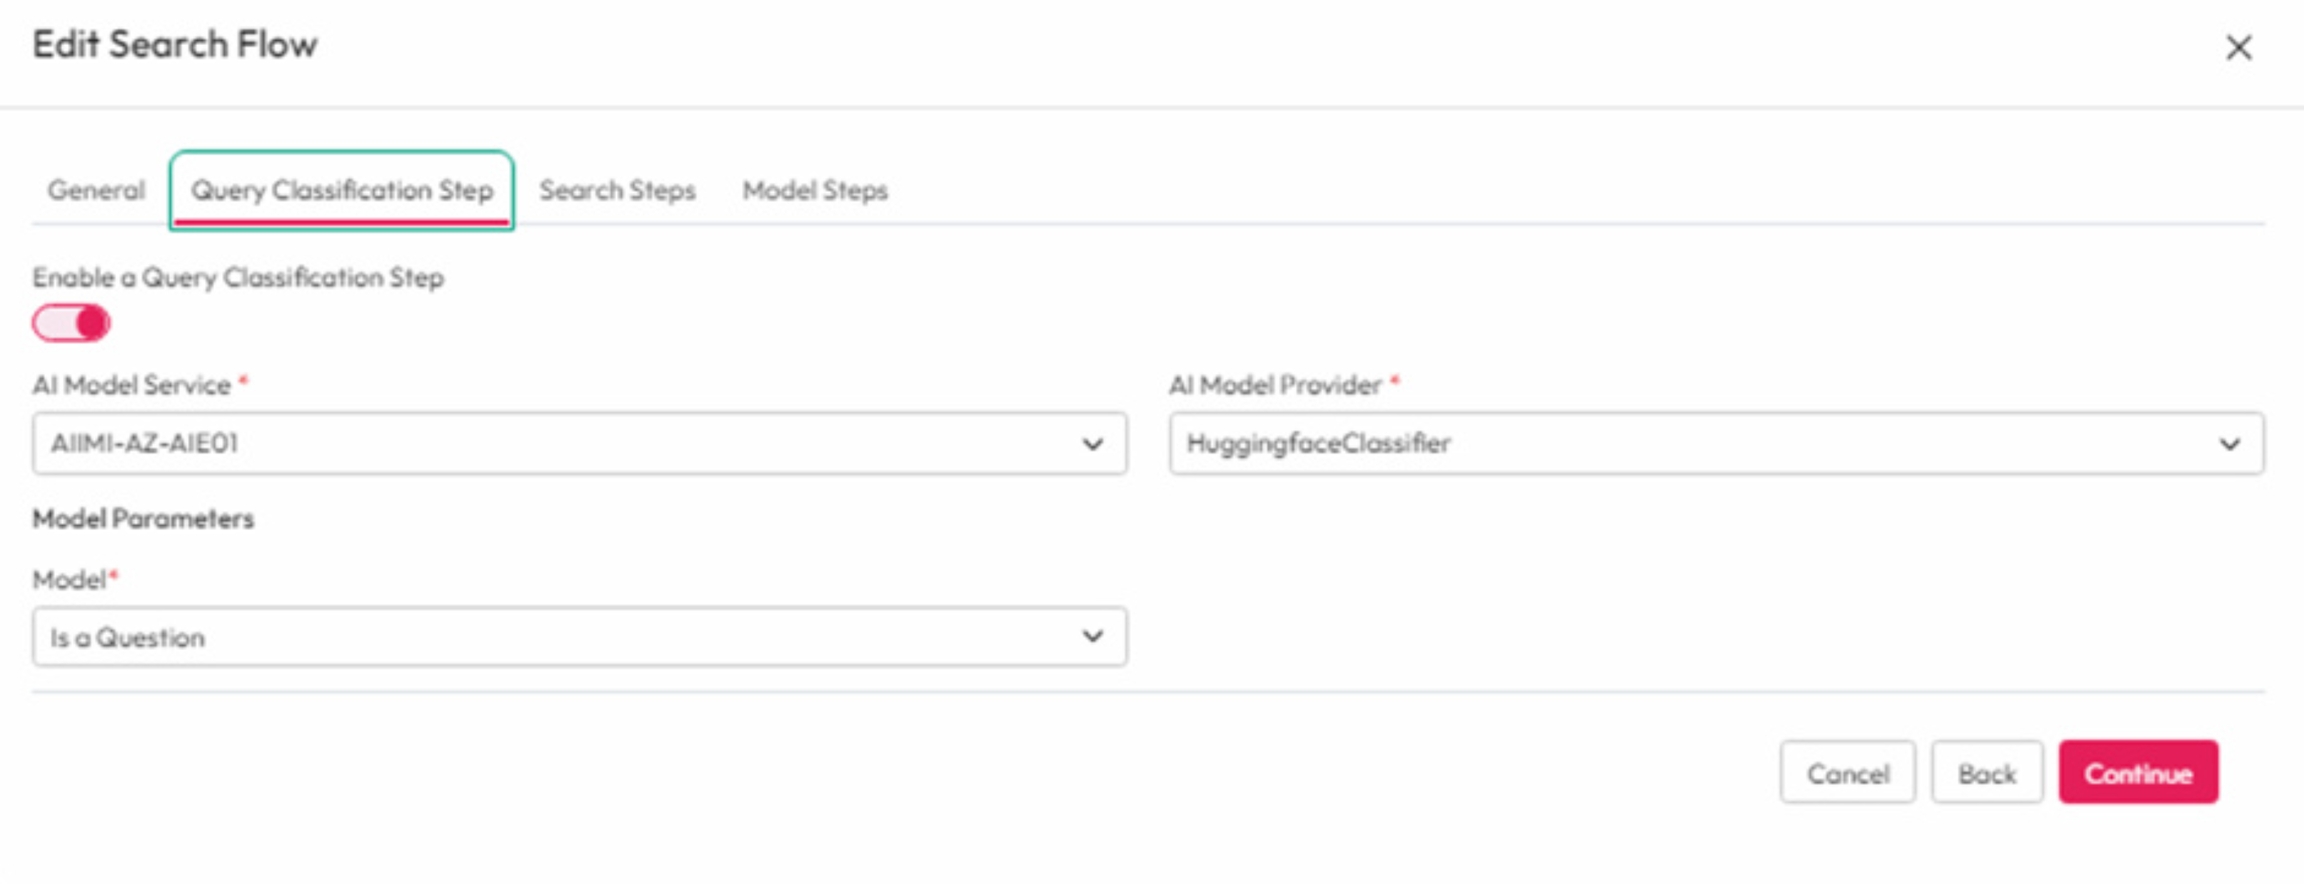
Query Classification Step
This step enables you to process the query string and label it before executing the search. It can determine the direction of the flow based on the search steps configured.
AI Model Service: Select a model service from the dropdown.
AI Model Provider: Select a model provider from the dropdown.
Model: Select Is a Question.
The basic use of this is to decide if a query is a question or not.

Search Steps
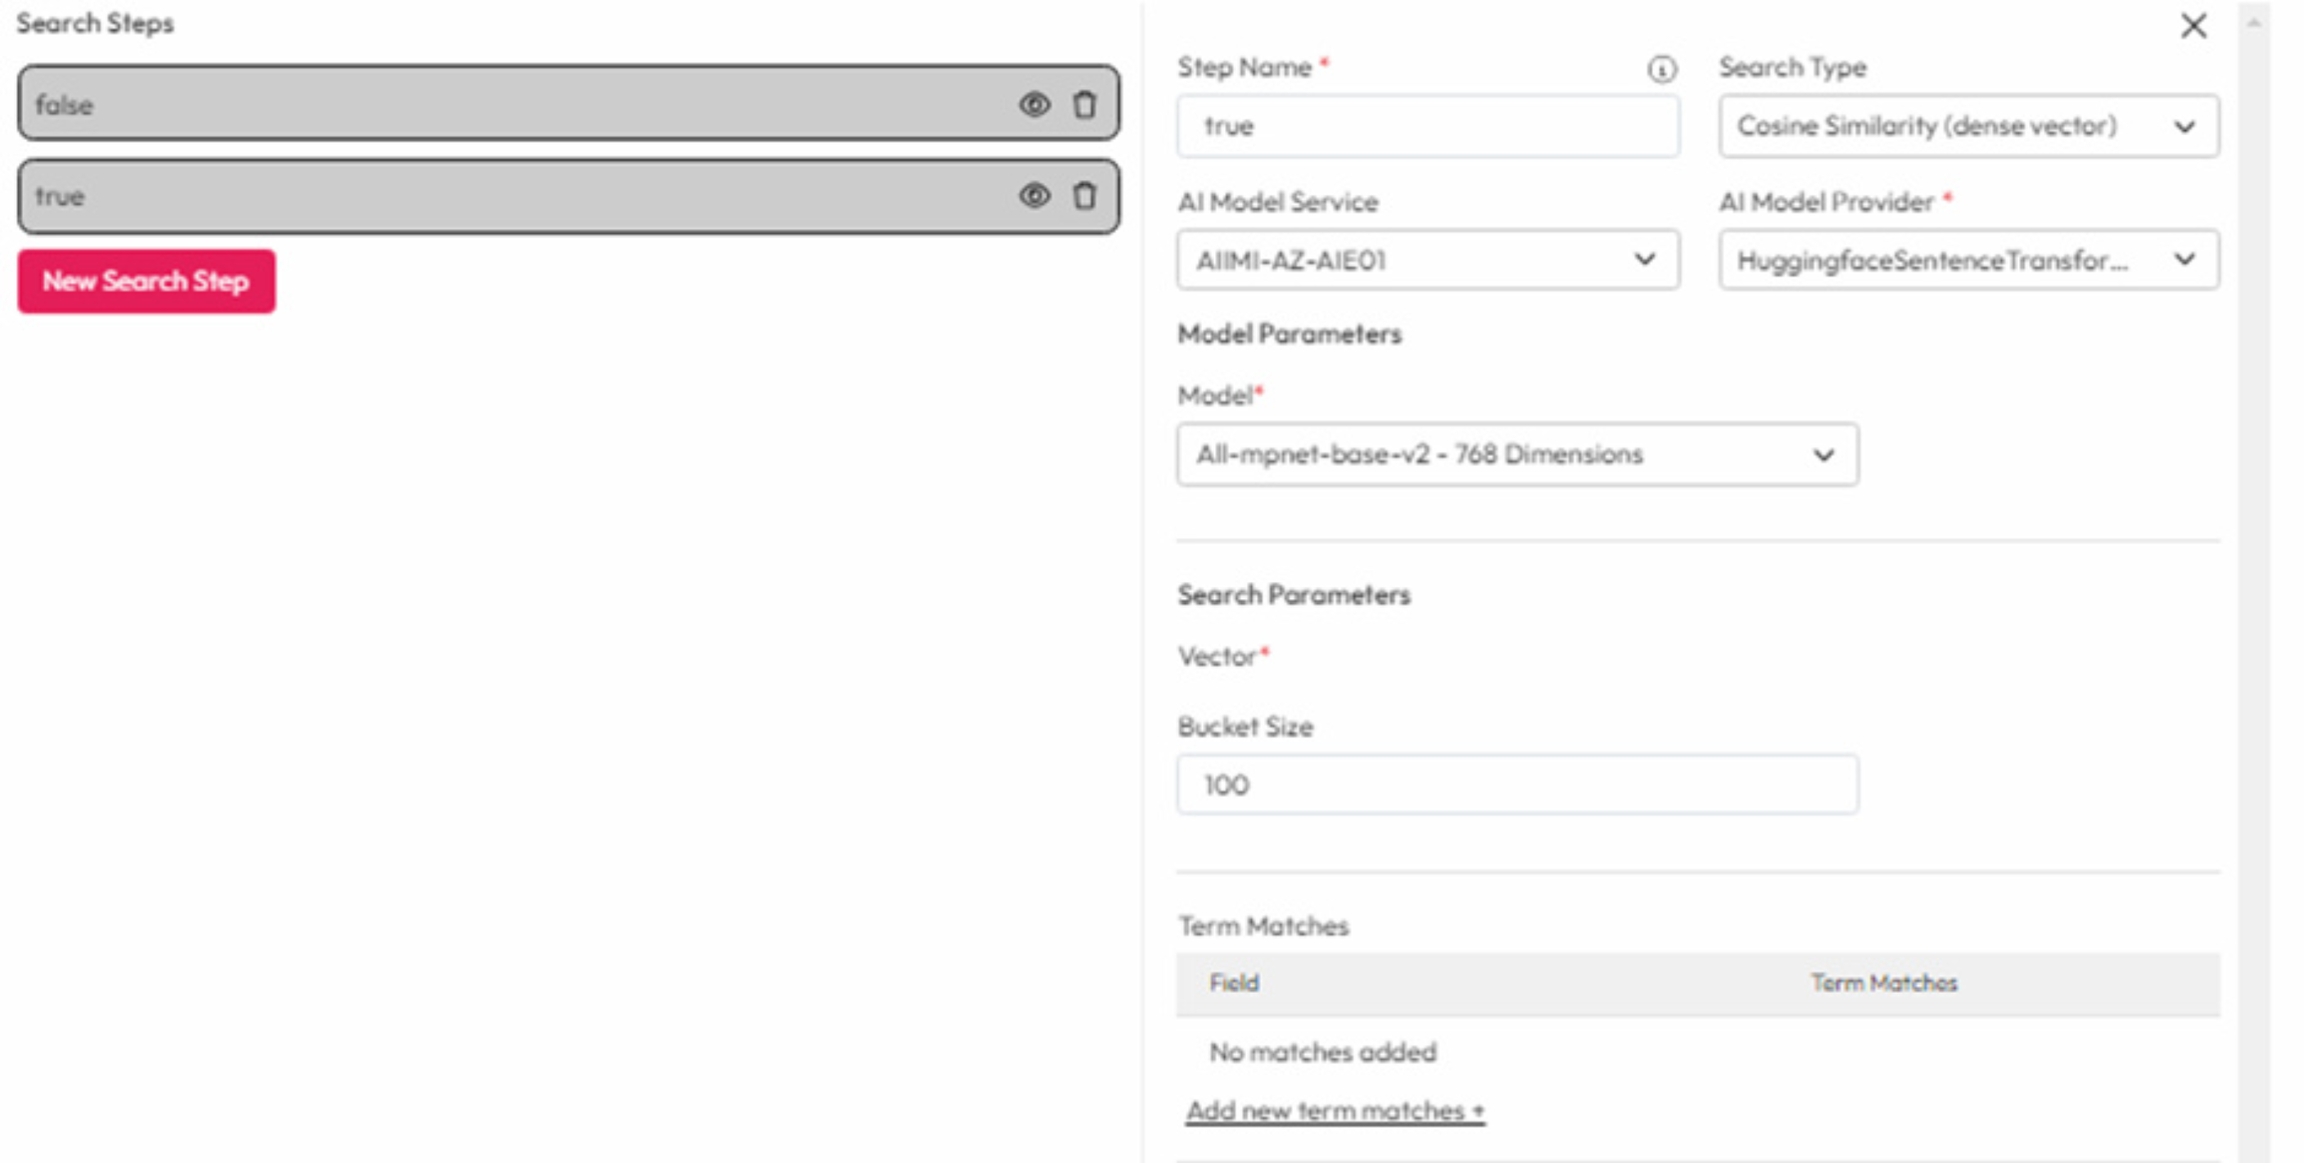
It's important that you create at least 2 search steps. One based on the classification step being true and another for false.
False
A false step is required to direct a query if it is not a question. We recommend setting this up as a Standard Keyword Search Type. This will then route non question searches to a keyword based search.
True
A true step will direct a question based query to a semantic search. This must be set as a Cosine Similarity search type. This runs a hidden keyword search, takes the defined number of results and reranks them based on Cosine Similarity.
Search Parameters
Bucket Size: You must define a bucket size for a cosine similarity search type. This defines how many of the top results are taken to rerank.
Static Term matches: This essentially enforces a filter on a search. The field is the name of the field that must contain matching information. The term match is the information that must be in the field.
Smart Query String Term Matches: This allows you to create smart matches for queries.
For example: If I set metadata.classification as the field and "Invoice" is a possible label. When a user searches “invoice for software”, the classification filter of Invoice will be applied.
Smart Query Properties: The properties can be used as synonyms for possible labels. The value should be the correct label value with property name being an alternative search term.
For example: If a user searches "bill for project15" this could be a synonym of the invoice label. So for this query, the filter of invoice will be applied.

Model Steps
Here you can define that the LLM is only used when the original query was a question. If it is not a questions it will simply do a keyword search.
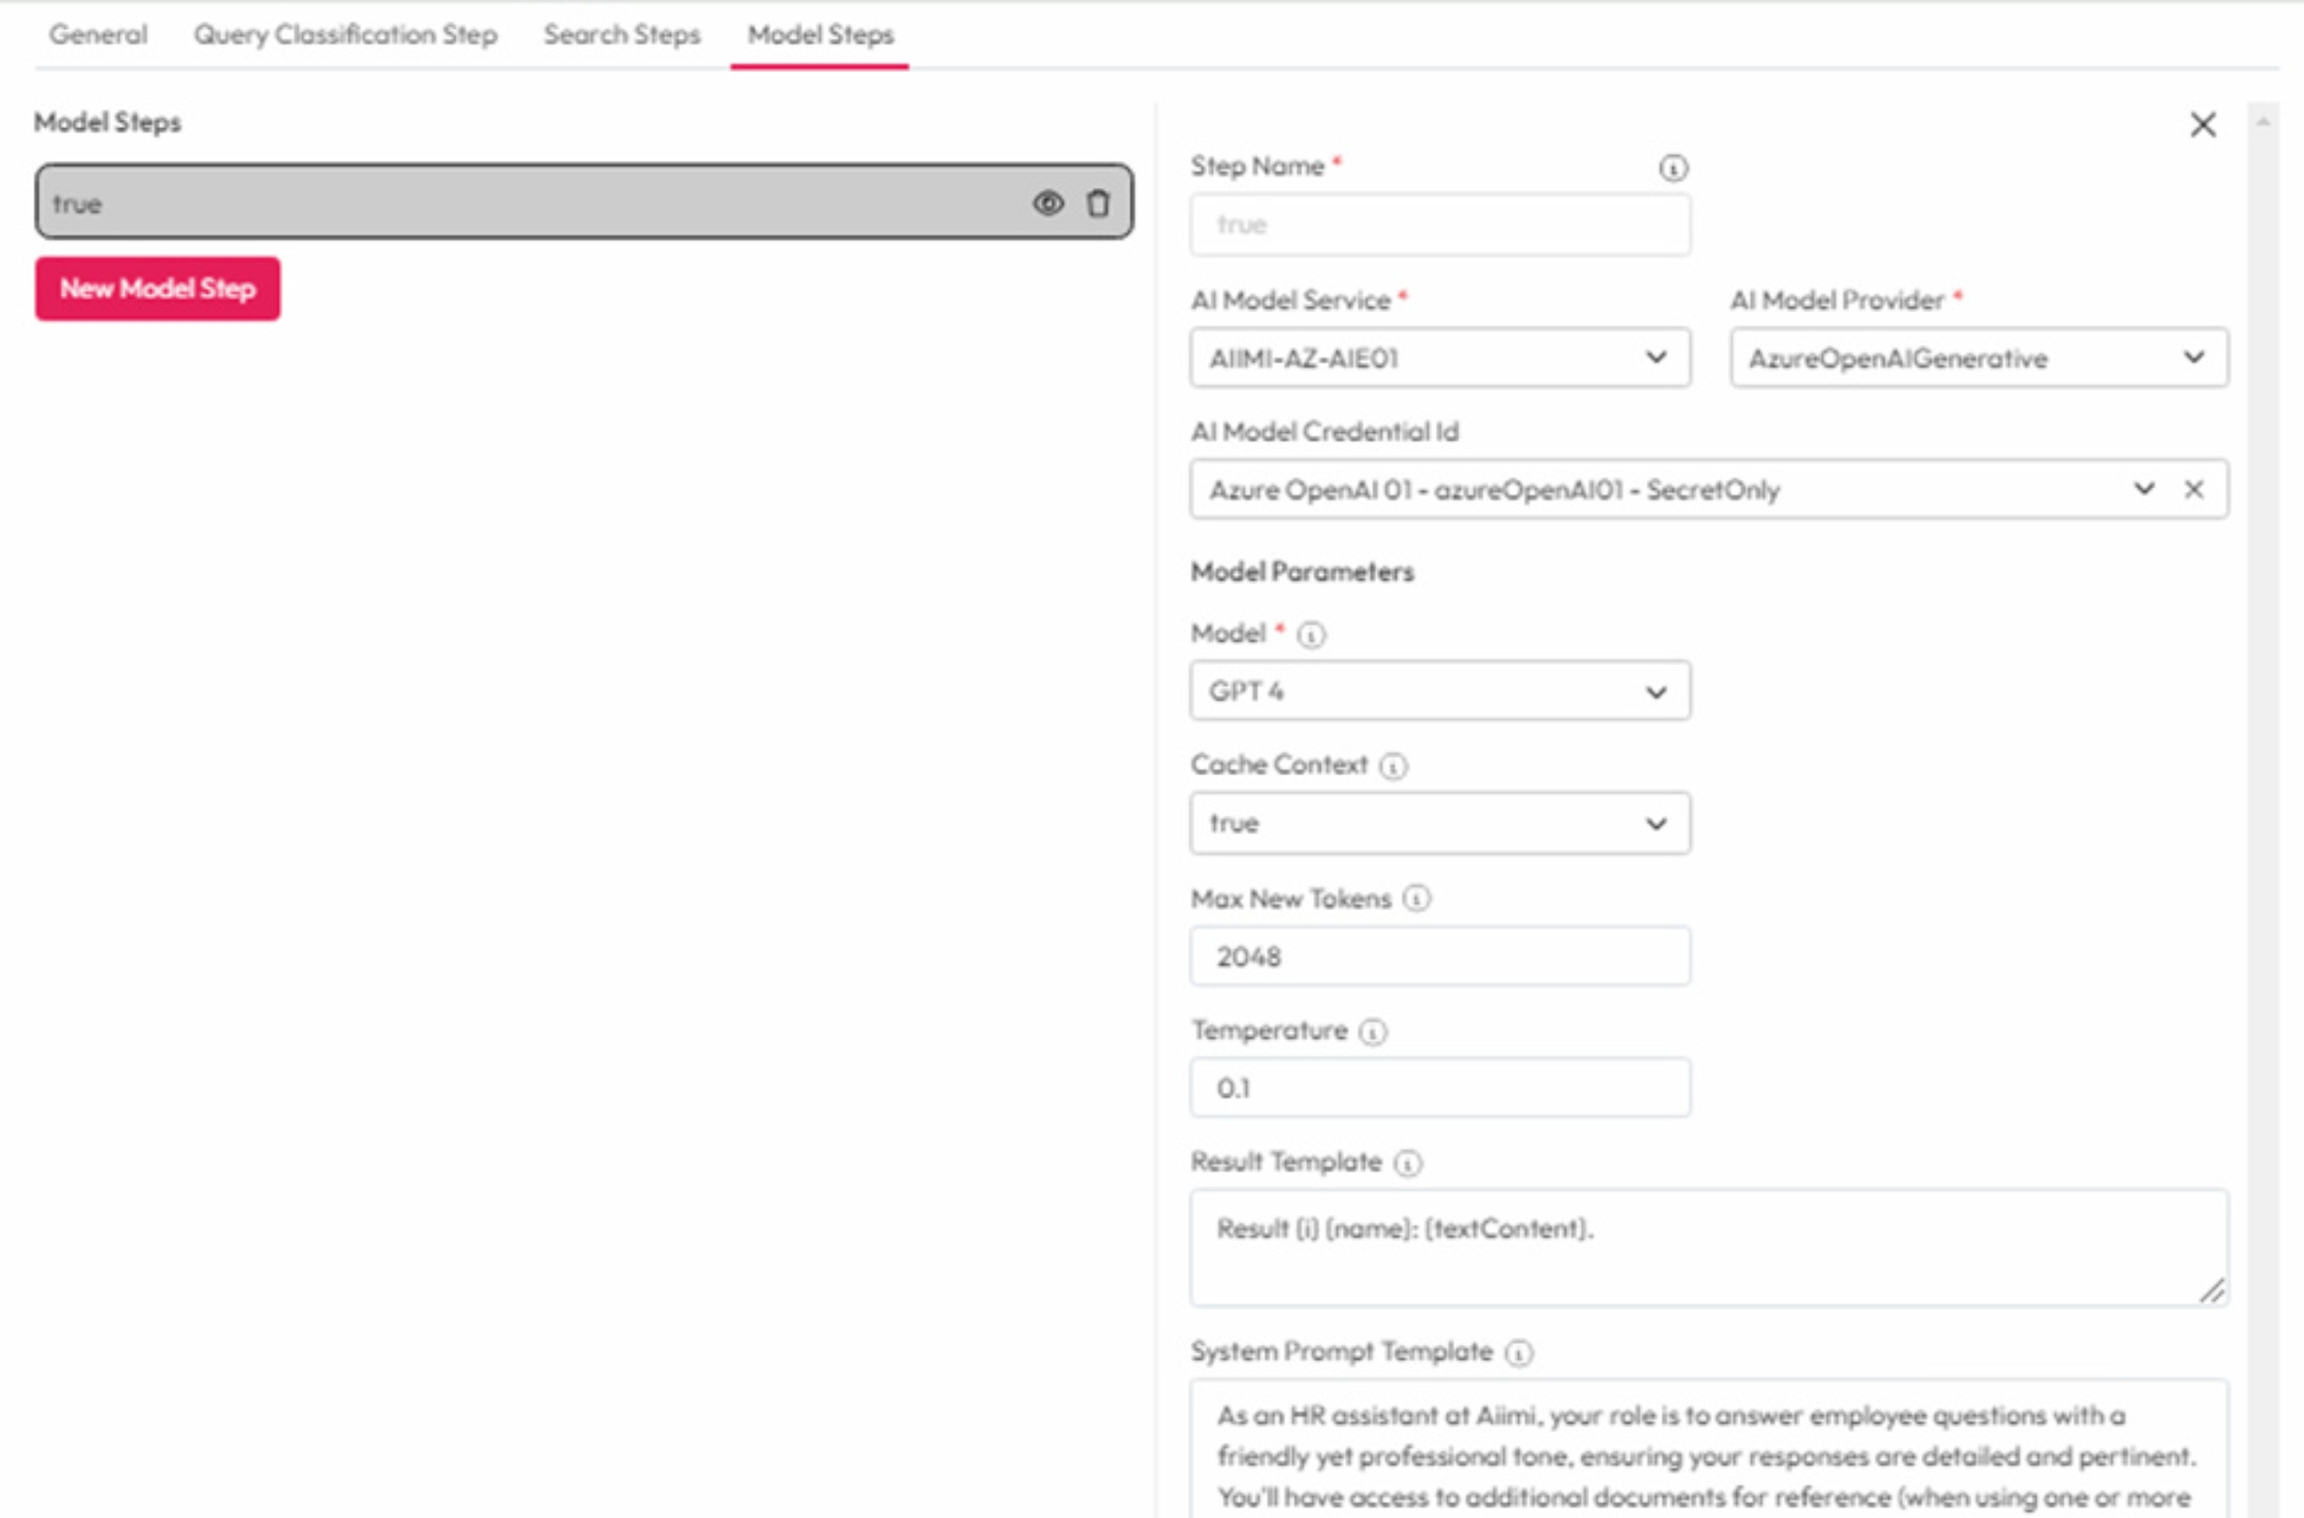
Step Name: Enter a name for this step.
If classifications was used this must match the query classification label.
AI Model Service: Select a model service from the dropdown.
AI Model Provider: Select a model provider from the dropdown.
AI Model Credential ID: Select the credential to be used for this AI model.
Model Parameters
Model: Select the model to be used from the dropdown.
Cache context - We recommend enabling this to cache the results after the first prompt.
Max New Tokens - Enter the maximum size of the LLM response.
Temperature - 0.1 is recommended. Models usually range between 0 - 2.
Result Template: Enter the styling displayed for each search result.
Example: Result {i} {name}: {textContent}. The i is for the index number, name is the document name and the text content.
System Prompt Template: Enter any additional context that will be added to a prompt. It must include {text}, this variable contains all of the search results.
This allows the model to have more information and can improve the results returned.
