Create a Manual Request
Creating and completing a data request can all be done in Workplace AI.
Select SAR from the application menu.
Here you will find all open SARs and requests.
Select New Response.
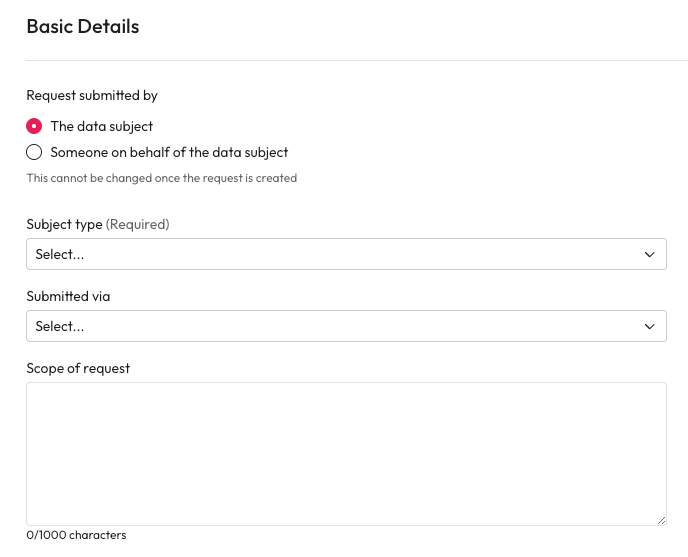
Basic Details
Enter some details about this request to help determine what information needs to be found.
Request submitted by - Select who is making this request, the data subject or someone on their behalf.
This selection cannot be changed once the request is created.
Subject type - Select the type of request from the dropdown list.
Submitted via - Select how this request has come to you from the dropdown list.
Scope of request - Add any additional information, details, or specific requests into this area.
Select continue to Subject Details
Subject Details
Enter the details of the subject and if applicable the details of any third parties. The details needed vary depending on who is submitting the request.
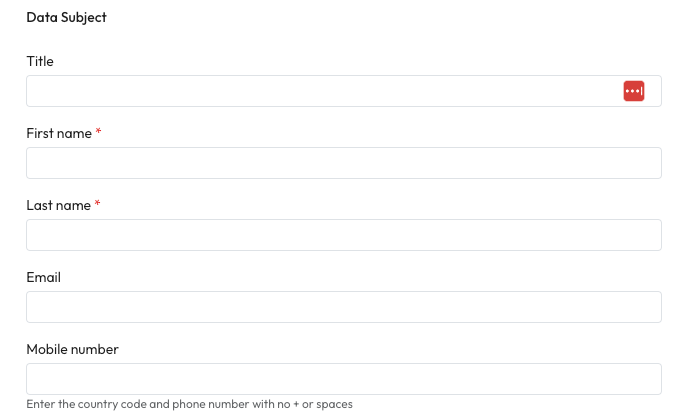
Data Subject
This information is used to find the data about the subject.
Title (Optional) - Enter the title of the data subject.
First name - Enter the first name of the data subject.
Last name - Enter the last name or surname of the data subject.
Email - Enter the email of the data subject.
Mandatory if, the data subject made the request.
If the request was made by a third party, this is not mandatory.
Mobile number (Optional) - Enter the country code and phone number with no + or spaces.
This will be used for communication if the data subject made the request.
Current address and postcode (Optional) - Enter the address of the subject including their postcode.
Additional information (Optional) - Enter any additional notes about the data subject that may help when gathering information.
Select continue to Search Settings
Requestor Contact Details
This section will only appear if the request is submitted by someone on behalf of the data subject. The information gathered will be used to communicate with the requestor.
Title (Optional) - Enter the title of the requestor.
First name - Enter the first name of the requestor.
Last name - Enter the last name or surname of the requestor.
Email - Enter the email of the requestor.
Mobile number (Optional) - Enter the country code and phone number with no + or spaces.
Select continue to Search Settings
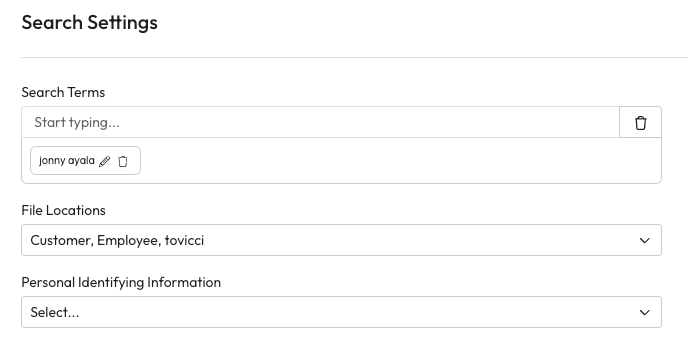
Search Settings
Depending on the search type selected some of these fields may be completed.
Search Terms - Enter any search terms that should be used for this SAR.
File Locations - Select the file locations that should be searched from the dropdown.
Personal Identifying Information - Select any specific PII that should be found and identified.
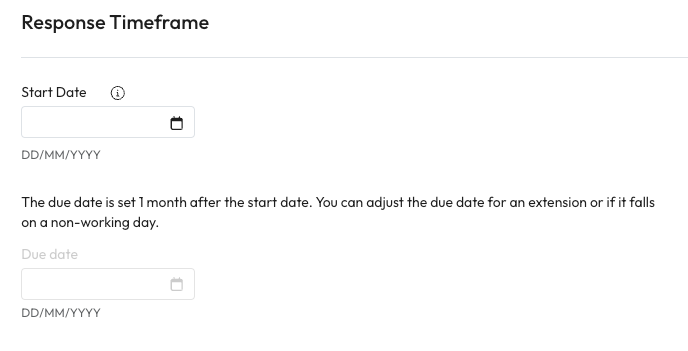
Response Timeframe
Start date - Select a start date using the calendar picker.
If no start date is selected, it will auto populate once the request is 'In Progress'.
When a start date is added the due date will automatically set to 1 month from the start date. You can adjust this date to account for extensions of non-working days.
Due Date - Select a due date using the calendar picker.
Select continue to Collection Settings
Collection Settings
Name - Enter a name for the SAR.
This is shown as the SAR collections display name.
Labels - Select the labels to apply to this request from the dropdown.
The SAR label will apply by default so you can see which Collections are part of a request. This cannot be removed.
Owner - Select an Owner for this request from the dropdown.
Contributors - Add any contributors by typing names or groups into the search box.
Contributors are able to add items to the response.
Visible to - Choose who is able to see the request.
Owner and contributors only - This will only appear in the list for Owners and Contributors.
All SAR Users - This will appear in the list for everyone with access to SAR.
Select continue to Disclosure Portal if available.
If not, select Create Request.

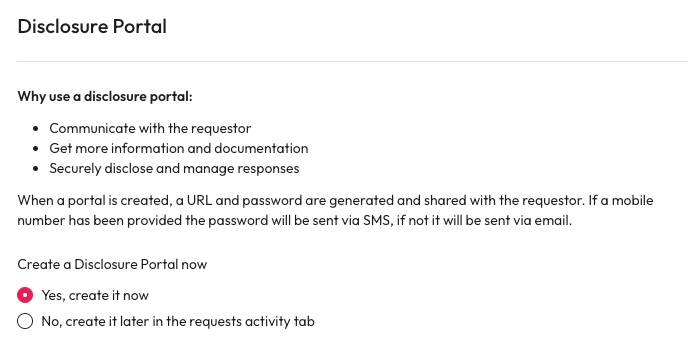
Disclosure Portal
Choose if a Disclosure Portal should be used to disclose the response.
If the Disclosure Portal has been disabled by an administrator the response will need to be disclosed using alternative methods.
Create a disclosure portal now - Choose if the portal should be created now or later.
Yes, create it now - The portal will be created with the request.
No, Create it later in the activity tab - If required, you can create it later from the SAR activity tab.
Select Create Request