User Guide Release Heelflip
Admin GuidesAiimi
  • Introducing Aiimi Insight Engine
    • Heelflip Release
      • Insightful Views - Timeline
      • Enriched Reporting With OData
  • Search
    • Introduction
    • Searching for Information
      • Optimising a search
        • Filtering and searching
      • Folder Browsing
      • Saving Searches
      • Multilingual Search
    • Search Results
      • View Documents In One Place
      • Lenses and Result Views
        • Timeline
        • Relationship
          • Finding Result Connections
          • Minimum Results
          • Relationship Type
          • Accessible Relationship Map
      • Filtering Results
        • Using Minimum Matching Terms
        • Using Synonyms
      • Sorting Results
      • Subject Matter Experts
      • Why These Results
        • Find Searched Terms
        • Mark As Useful
        • Mark As Sensitive
        • Why My Search Matched
      • Related Result Connections
        • Understand Connections
        • Adding card details
        • Explore More Connections
  • Collections
    • What is a Collection?
      • Collection Types
    • Manage collections
      • Create a Collection
      • Status Management
      • Edit, Delete or Merge
    • Using a Collection
      • Add Items to a Collection
      • Sharing a Collection
      • Adding Comments to a Collection
  • Subject Access Request
    • Introduction
    • Creating or Receiving New SARs
      • Requests From The Portal
        • Creating a SAR from the Portal
        • Assigning a Request
      • Create a Manual Response
        • Searches
        • Subject
        • Collection Settings
        • Privacy Portal
      • Create and Manage Data Subject Types
    • Data for a SAR
      • Finding Information for a SAR
        • Payment Card Information (PCI)
        • Personally Identifiable Information (PII)
        • Redacting Sensitive Information
      • Messaging a SAR Requestor
      • Internal SAR Messaging
    • Completing a SAR
      • Finding a SAR
      • Getting Data Reviewed
        • Assigning Users to a SAR
      • Exporting a SAR Response
      • Disclosing to the Portal
  • Help and Support
    • Leaving Feedback
    • Accessibility Statement for Aiimi Insight Engine
  • Advanced Applications
    • Metrics
    • Manage Collection Type
      • Create a Collection Type
    • Using The Manage Chart
    • OData API
      • Getting OData from Aiimi Insight Engine
        • Query Parameters
Powered by GitBook
On this page
  • Email Verification
  • Details for a Request
  • Requests For Myself
  • Requests On Behalf of someone else
  1. Subject Access Request
  2. Creating or Receiving New SARs
  3. Requests From The Portal

Creating a SAR from the Portal

PreviousRequests From The PortalNextAssigning a Request

Last updated 1 year ago

Requestors will be able to access access the Privacy Portal and submit a Subject Access Request for themselves.

Requests can be submitted through your Privacy Portal URL with /#/verification at the end. - For example: - Your administrator will set the Privacy Portal URL.

Email Verification

A requestor must use a valid email address to create a SAR from the Privacy Portal.

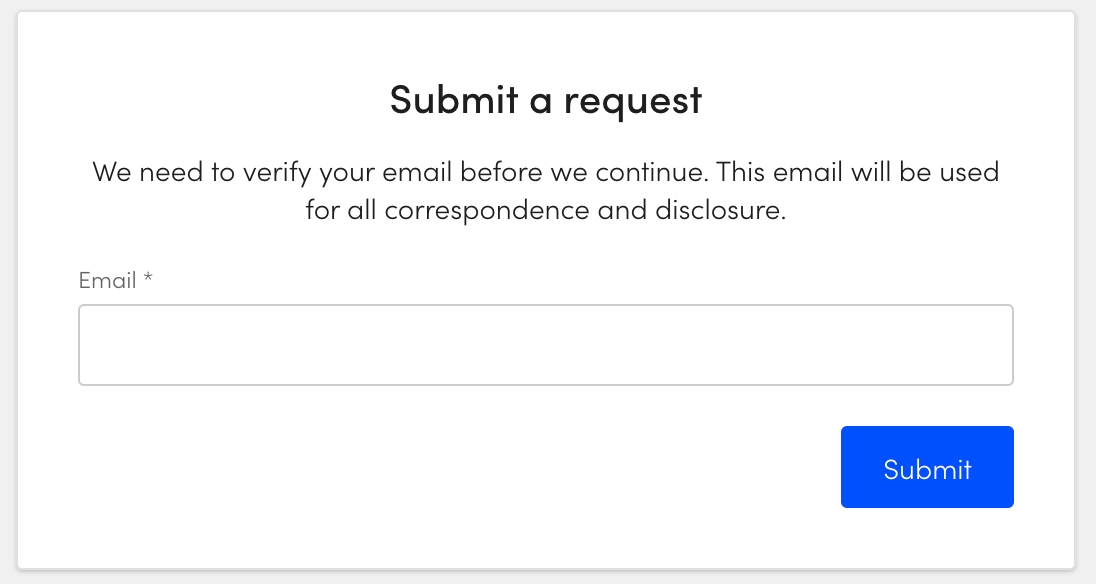
  1. The requestor must access the privacy portal verification URL to submit a request.

  2. Enter the requestors email address.

    • This will send an email with a verification link to verify their email and continue the request.

Details for a Request

  1. The Requestor must select the URL within the email.

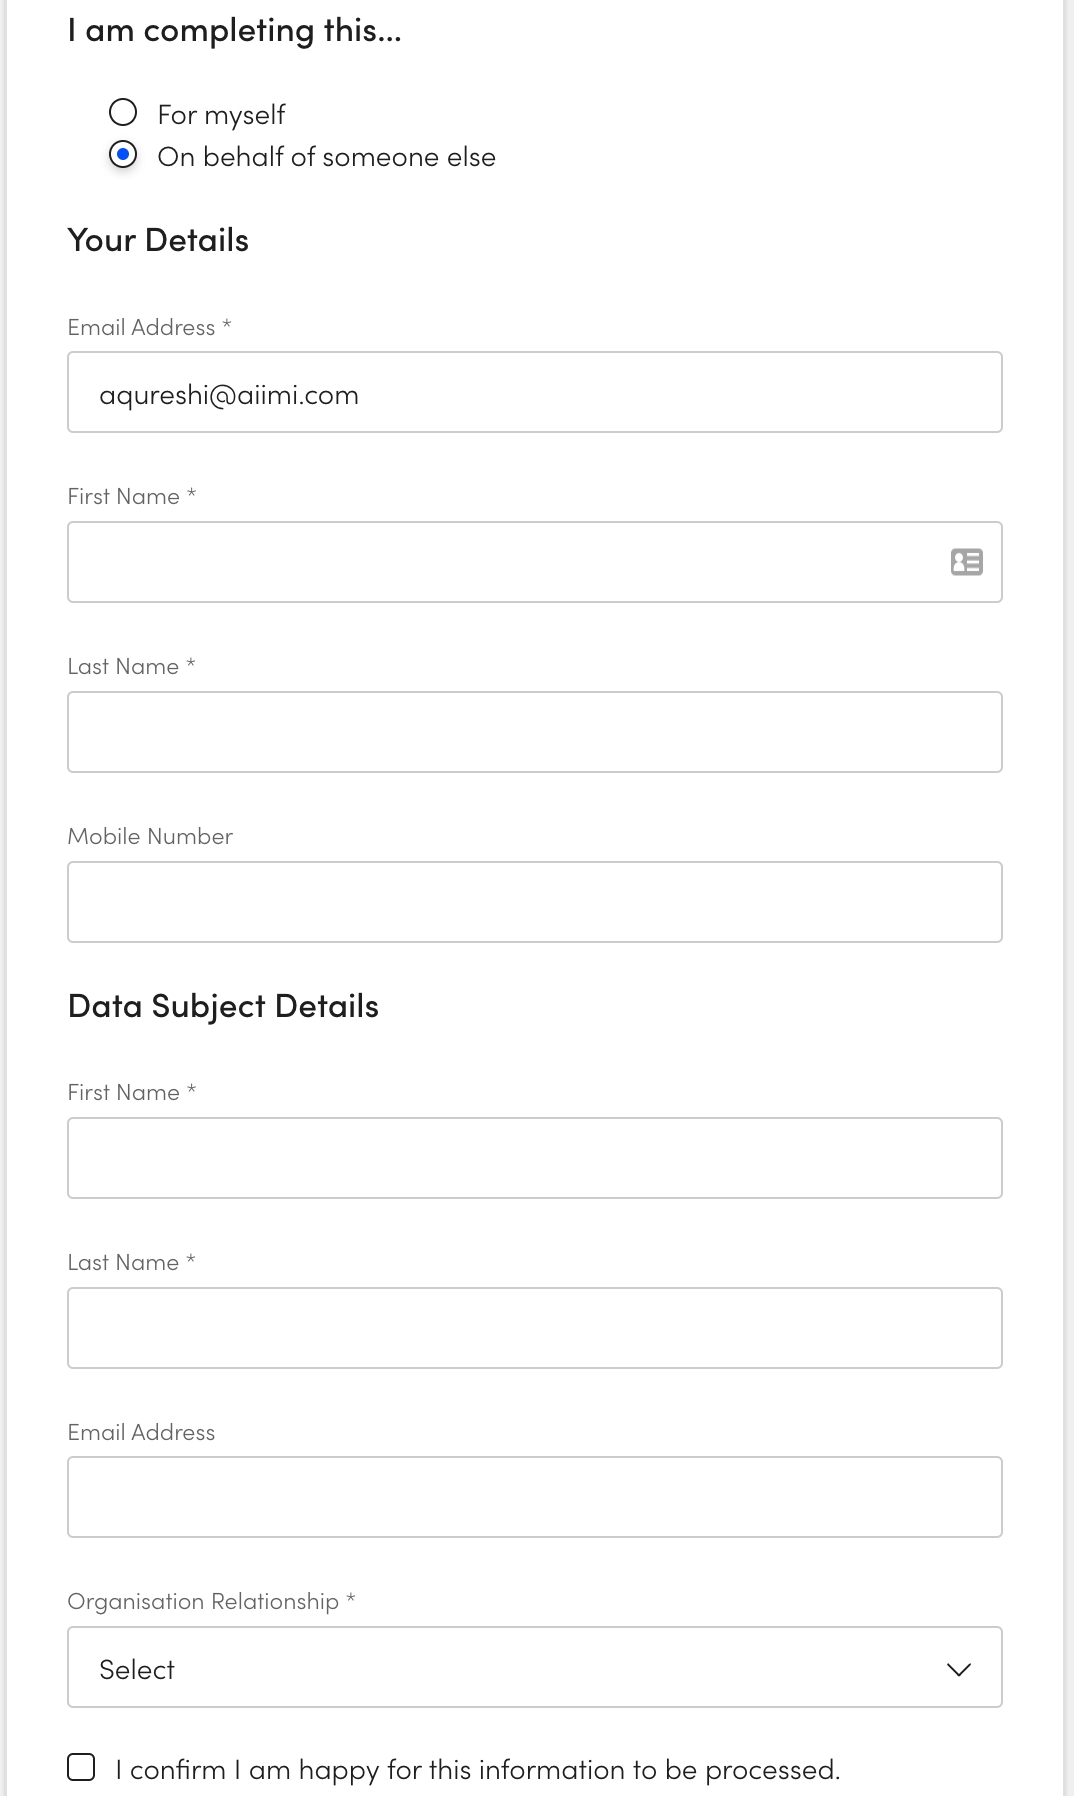
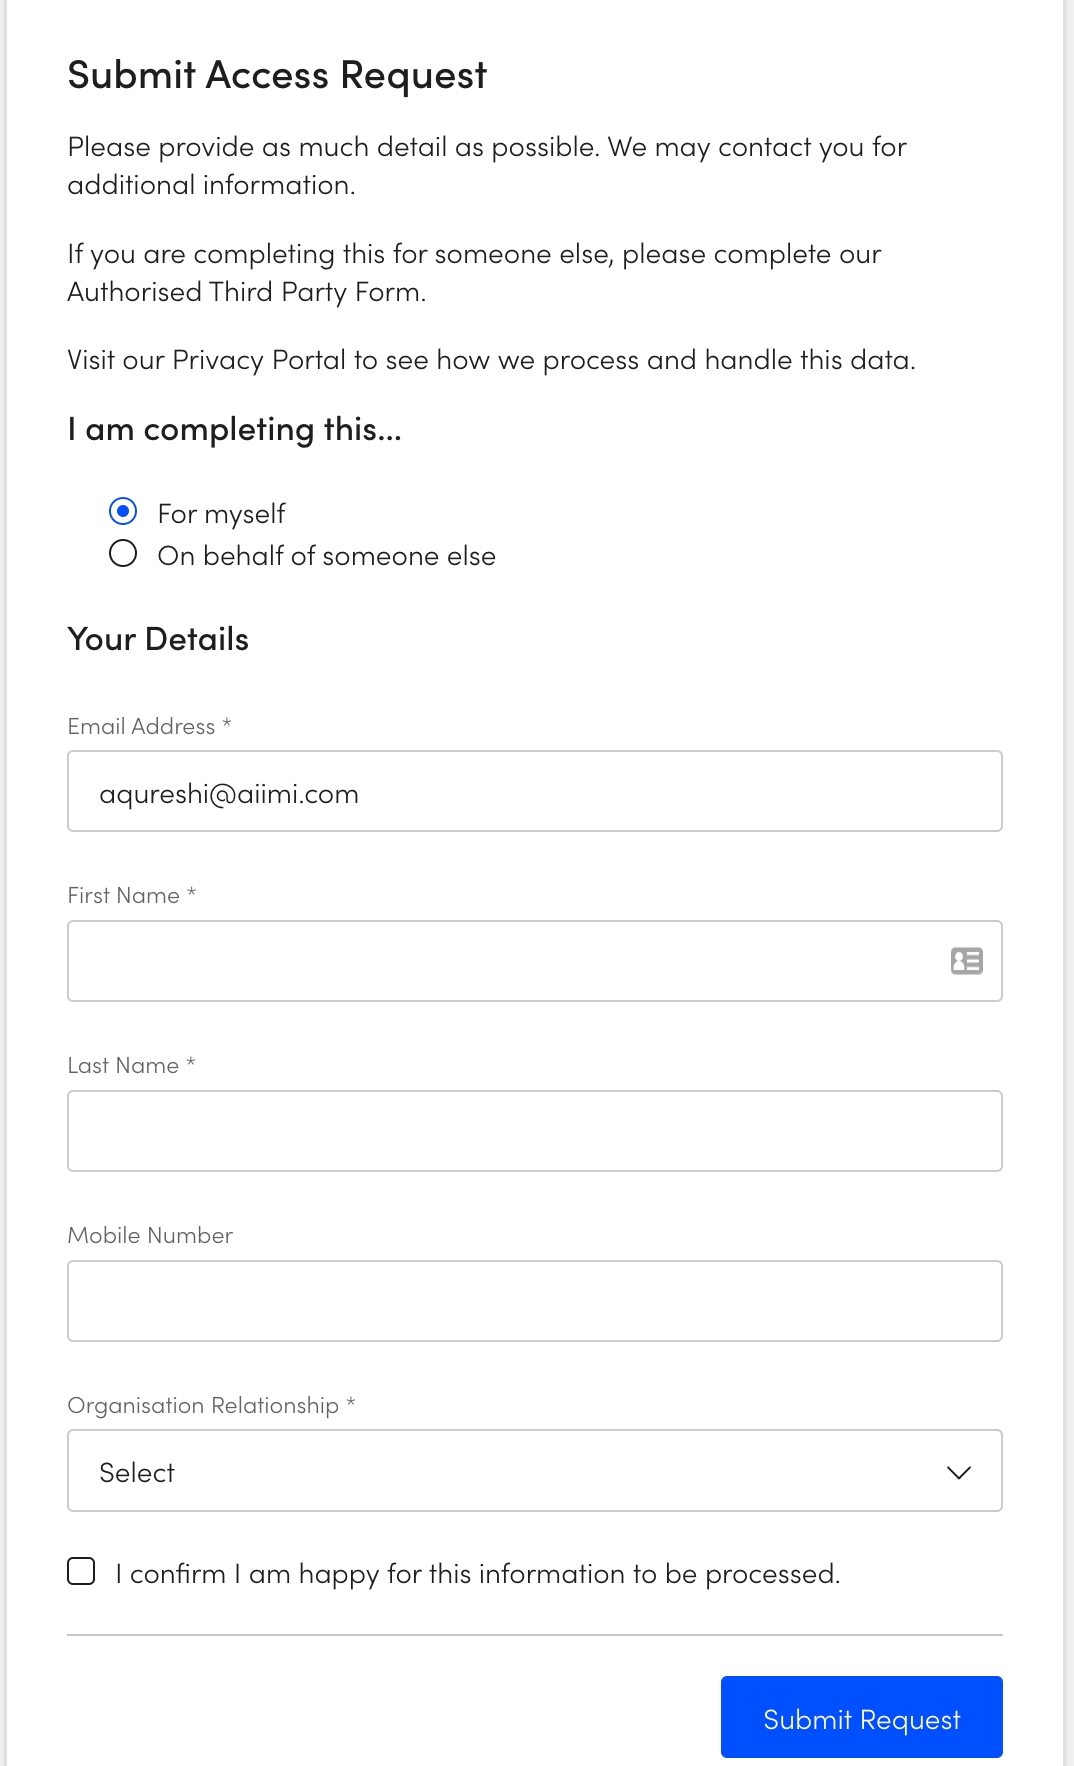
  2. Select who is the request is being completed by.

    • For myself if the data subject is completing the request.

    • On Behalf of someone else if a third party is completing the request.

Requests For Myself

These details will be used for communicating with the Requestor and also be the details used to perform any searches.

  1. The verified email address will be populated within Email Address.

    • This will be used for communication about the SAR.

    • This field cannot be edited. If it is incorrect they will need to submit a new email address and verify that address instead.

  2. Enter their First Name and Last Name.

  3. Enter their Mobile Number.

    • This will be used for communication about the SAR.

  4. Select the relationship they have from the Organisation Relationship.

  5. Check 'I confirm I am happy for his information to be processed'.

    • This confirms they are happy for the details given to be processed and they are accurate to the best of their knowledge.

  6. Select Submit Request once this form is complete.

Requests On Behalf of someone else

Requestor Details

  1. The verified email address will be populated within Email Address.

    • This will be used for communication about the SAR.

    • This field cannot be edited. If it is incorrect they will need to submit a new email address and verify that address instead.

  2. Enter the First Name and Last Name of the requestor.

  3. Enter their Mobile Number.

    • This will be used for communication about the SAR.

Data Subject Details

  1. The First and Last name of the Subject.

  2. The email of the data subject.

    • This will be used to search and find more detail.

  3. Select the relationship the subject has from the Organisation Relationship dropdown.

  4. Check 'I confirm I am happy for his information to be processed'.

    • This confirms they are happy for the details given to be processed and they are accurate to the best of their knowledge.

  5. Select Submit Request once this form is complete.

Once submitted a requestor will be given confirmation and a reference number for their request.

www.TovicciPortal.com/#/verification