
Windows: Workplace AI Install
This guide walks you through setting up a single node Workplace AI instance. It is for Windows 2016 or later.
Download Software
The following guide assumes everything is being stored in the C: drive. You can use any drive but we recommend installing to the root.
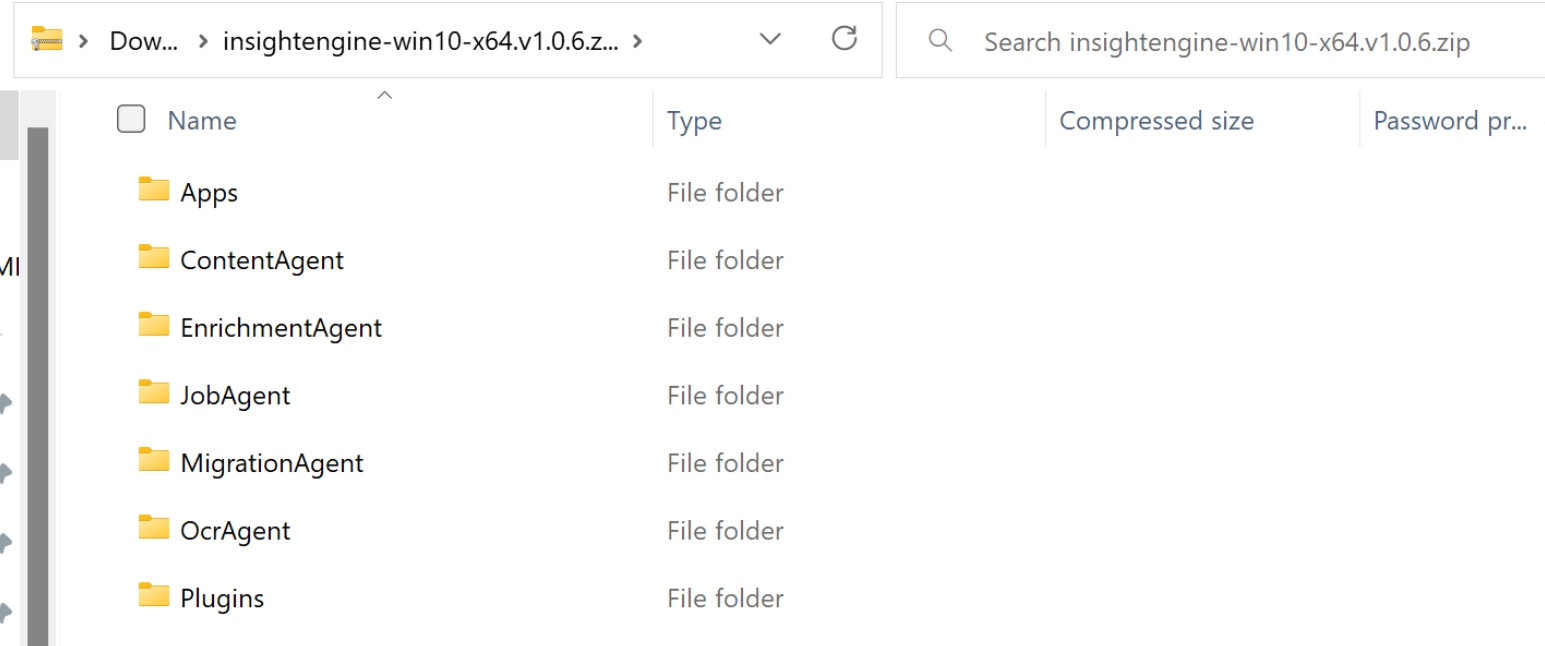
Check if your Workplace AI distribution is extracted into C:\InsightMaker.
If it's not, open PowerShell as an Admin.
Run the following script to extract the zip file to C:\InsightMaker.
Check the storage path in this script before running it. For example: (C:\).
Expand-Archive -Force C:\Downloads\insightmaker-win*.zip C:\InsightMakerRun the following script to download the redistributables and dotnet bundle.
Check the storage path in this script before running it. For example: (C:\).
Start-BitsTransfer -Source "https://aka.ms/vs/17/release/vc_redist.x86.exe" -destination "C:\Downloads";
Start-BitsTransfer -Source "https://aka.ms/vs/17/release/vc_redist.x64.exe" -destination "C:\Downloads";
Start-BitsTransfer -Source "https://builds.dotnet.microsoft.com/dotnet/aspnetcore/Runtime/8.0.16/dotnet-hosting-8.0.16-win.exe" -destination "C:\Downloads"
Prepare Files
Run the following script to stop Windows silently blocking files.
Check the storage path in this script before running it. For example: (C:\).
gci C:\InsightMaker\Plugins\*.dll | Unblock-File;
gci C:\InsightMaker\Scripts\*.ps1 | Unblock-FileRun the following script to update the Agent config file names.
Check the storage path in this script before running it. For example: (C:\).
$Filename = "C:\InsightMaker\ContentAgent";
Copy-Item -Path "$filename\appsettings.default.json" -Destination "$filename\appsettings.json" -Force;
Copy-Item -Path "$filename\log4net.default.config" -Destination "$filename\log4net.config" -Force;

$Filename = "C:\InsightMaker\EnrichmentAgent";
Copy-Item -Path "$filename\appsettings.default.json" -Destination "$filename\appsettings.json" -Force;
Copy-Item -Path "$filename\log4net.default.config" -Destination "$filename\log4net.config" -Force;

$Filename = "C:\InsightMaker\JobAgent";
Copy-Item -Path "$filename\appsettings.default.json" -Destination "$filename\appsettings.json" -Force;
Copy-Item -Path "$filename\log4net.default.config" -Destination "$filename\log4net.config" -Force;

$Filename = "C:\InsightMaker\MigrationAgent";
Copy-Item -Path "$filename\appsettings.default.json" -Destination "$filename\appsettings.json" -Force;
Copy-Item -Path "$filename\log4net.default.config" -Destination "$filename\log4net.config" -Force;

$Filename = "C:\InsightMaker\OCRAgent";
Copy-Item -Path "$filename\appsettings.default.json" -Destination "$filename\appsettings.json" -Force;
Copy-Item -Path "$filename\log4net.default.config" -Destination "$filename\log4net.config" -Force;

$Filename = "C:\InsightMaker\SecurityAgent";
Copy-Item -Path "$filename\appsettings.default.json" -Destination "$filename\appsettings.json" -Force;
Copy-Item -Path "$filename\log4net.default.config" -Destination "$filename\log4net.config" -Force;

$Filename = "C:\InsightMaker\SourceAgent";
Copy-Item -Path "$filename\appsettings.default.json" -Destination "$filename\appsettings.json" -Force;
Copy-Item -Path "$filename\log4net.default.config" -Destination "$filename\log4net.config" -Force;Run the following script to update the Apps and Utils config file names.
Check the storage path in this script before running it. For example: (C:\).
$Filename = "C:\InsightMaker\Apps\Admin\Api";
Copy-Item -Path "$filename\appsettings.default.json" -Destination "$filename\appsettings.json" -Force;
Copy-Item -Path "$filename\log4net.default.config" -Destination "$filename\log4net.config" -Force;
Copy-Item -Path "$filename\web.default.config" -Destination "$filename\web.config" -Force

$Filename = "C:\InsightMaker\Apps\Admin\app";
Copy-Item -Path "$filename\web.default.config" -Destination "$filename\web.config" -Force;

$Filename = "C:\InsightMaker\Apps\search\api";
Copy-Item -Path "$filename\appsettings.default.json" -Destination "$filename\appsettings.json" -Force;
Copy-Item -Path "$filename\log4net.default.config" -Destination "$filename\log4net.config" -Force;
Copy-Item -Path "$filename\web.default.config" -Destination "$filename\web.config" -Force;

$Filename = "C:\InsightMaker\Utils\InsightMaker.IndexUtilities";
Copy-Item -Path "$filename\appsettings.default.json" -Destination "$filename\appsettings.json" -Force;
Copy-Item -Path "$filename\log4net.default.config" -Destination "$filename\log4net.config" -Force;

$Filename = "C:\InsightMaker\Utils\InsightMaker.Security.BuiltinSecurityUtilities";
Copy-Item -Path "$filename\appsettings.default.json" -Destination "$filename\appsettings.json" -Force;
Copy-Item -Path "$filename\log4net.default.config" -Destination "$filename\log4net.config" -Force;
Aiimi Insight Configurations
Run the following script to update your AppSettings.json files.
Check the storage path and update it where it says "Text input" with the relevant information. Ensure the following information is input correctly:
Elastic Certificate Password, Elastic password, Elastic Prefix, RemoteApi Certificate Password, License Key and License Signature.
The license signature should be a unique value for this system.
cd C:\InsightMaker\Utils\InsightMaker.SettingsUtilities;
.\InsightMaker.SettingsUtilities.exe patch -i C:\InsightMaker\ -a "elastic.certificate.path" -v "C:\Apps\certs\elastic-stack-ca.p12";
.\InsightMaker.SettingsUtilities.exe patch -i C:\InsightMaker\ -a "elastic.certificate.password" -v "Text input";
.\InsightMaker.SettingsUtilities.exe patch -i C:\InsightMaker\ -a "elastic.password" -v "Text input";
.\InsightMaker.SettingsUtilities.exe patch -i C:\InsightMaker\ -a "elastic.prefix" -v "Text input";
.\InsightMaker.SettingsUtilities.exe patch -i C:\InsightMaker\ -a "elastic.server" -l "https://localhost:9200";
.\InsightMaker.SettingsUtilities.exe patch -i C:\InsightMaker\ -a "plugins.locations" -l "C:\InsightMaker\Plugins"
.\InsightMaker.SettingsUtilities.exe patch -i C:\InsightMaker\ -a "remoteApi.certificate.path" -v "C:\Apps\certs\elastic-certificates.p12";
.\InsightMaker.SettingsUtilities.exe patch -i C:\InsightMaker\ -a "remoteApi.RemoteAddress" -v "https://localhost";
.\InsightMaker.SettingsUtilities.exe patch -i C:\InsightMaker\Apps\Admin\api -a "remoteApi.RemoteAddress" -v "https://localhost/admin/api";
.\InsightMaker.SettingsUtilities.exe patch -i C:\InsightMaker\Apps\Search\api -a "remoteApi.RemoteAddress" -v "https://localhost/api";
.\InsightMaker.SettingsUtilities.exe patch -i C:\InsightMaker\ -a "remoteApi.certificate.password" -v "Text input";
.\InsightMaker.SettingsUtilities.exe patch -c -i C:\InsightMaker\ -a "licenseKey" -v "Text input";
.\InsightMaker.SettingsUtilities.exe patch -c -i C:\InsightMaker\ -a "licenseSig" -v "Text input";
Json Web Token Config
Run the following script to update your JWT config key.
Check the storage path and update it where it says "Text input" with the relevant information.
The JWT configuration key must be at least 32 characters.
For help creating a random 32 character key see https://www.random.org.
Configure Log File Storage
Each agent has a log4net.default.config file. This file defines the path for the log directory and is C:\tmp\logs by default.
Run the following script to update the logs into their own subfolders by
Check the storage path in this script before running it. For example: (C:). The logs cannot be output to the InsightMaker folder.
Run the following script to update the remaining logs into their own subfolders.
Initialise Control Hub Parameter
Run the following script to initialise the Control Hub.
They configure the default elastic mappings for Workplace AI indices. They also create some useful default entities for your system.
Check the path of the storage location in this script before running it. For example: (C:\).
Agent Services
Run the following script to create all the agents.
Check the path of the storage location in this script before running it. For example: (C:\).
Update Descriptions
Run the following script to update the descriptions of these agents.
Install Tika
Run the following script to move the Tika server file.
Check the storage path and release names match the required versions. For example: (C:), (tika-server-standard-3.1.0).
Run the following script to create a run-tika.bat.
Check the storage path and release names match the required versions. For example: (C:), (tika-server-standard-3.1.0).
If your Elasticsearch is in a folder with spaces in the name, the Java path will need to be in quotation marks.
Run the following script to create the Tika service.
This will open an NSSM service installer modal.
Check the path of the storage location in this script before running it. For example: (C:\).
Path: Select the explore (...) button.
We recommend you don't copy and paste the file path.
Navigate to C:Utils\Tika\run-tika.bat.
Startup Directory: Select the explore (...) button
We recommend you don't copy and paste the file path.
Navigate to C:Utils\Tika.

Run the following script to start the Tika service.
Check Tika Services
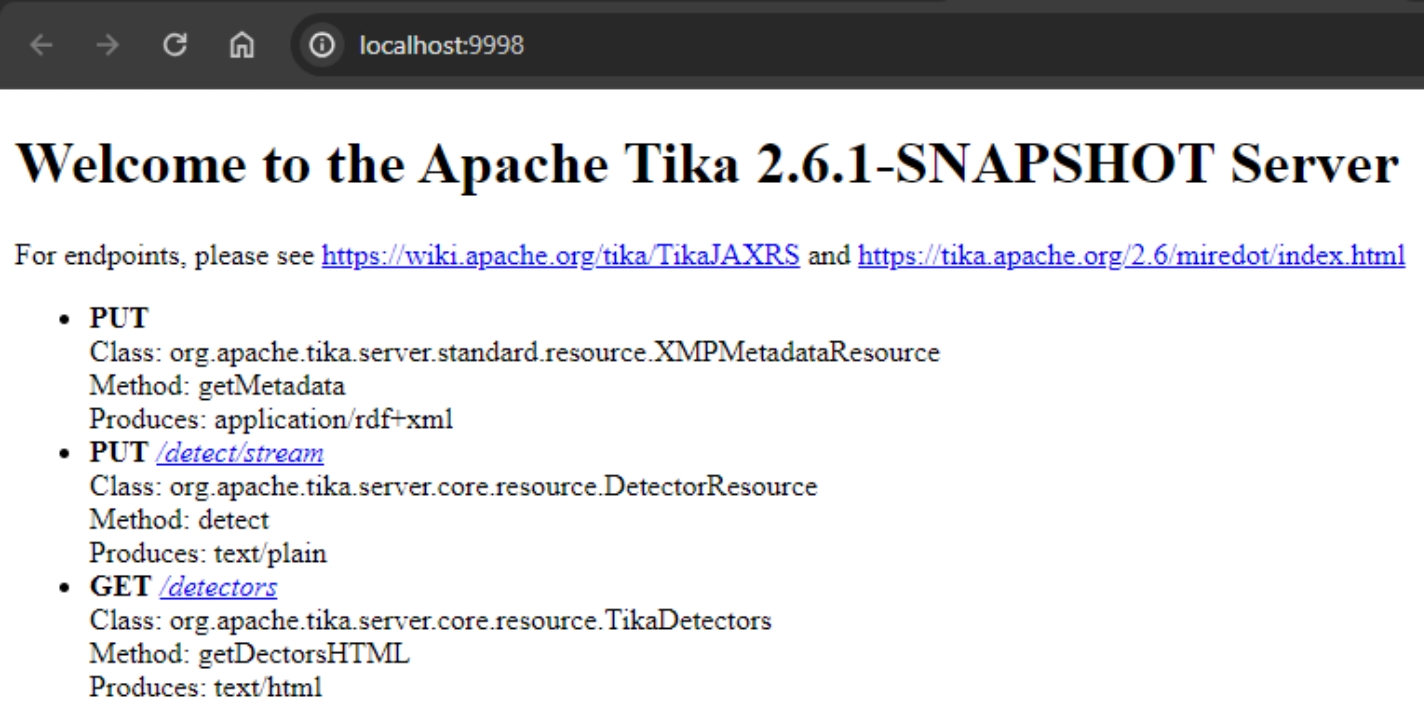
Open your web browser and navigate to http://localhost:9998 to check the status of Tika.
It should say: "Welcome to the Apache Tika X.X.X-SNAPSHOT Server".
IIS Configuration
The '.NET Core and HostingBundle' must be installed before you continue. If it's not, the middleware will not be able to run in IIS.
Run the following script to enable IIS.
Run the following command to create a self-signed certificate.
This is used later and can be updated for production builds.
Run the following script to create a new https (443) binding and remove the http (80) binding.
IIS Application Pools Setup
Run the following script to create a new application pool.
Run the following script to update the applications IIS settings.
IIS Assign Certificate to Binding
This sets up the default website on the server. It means it can be accessed using 'localhost' in any browser and the other apps using their alias. For example admin is accessed using localhost/admin.
The account IIS runs on needs read access to your Elasticsearch certificates.
Open IIS and navigate to the Default web site.
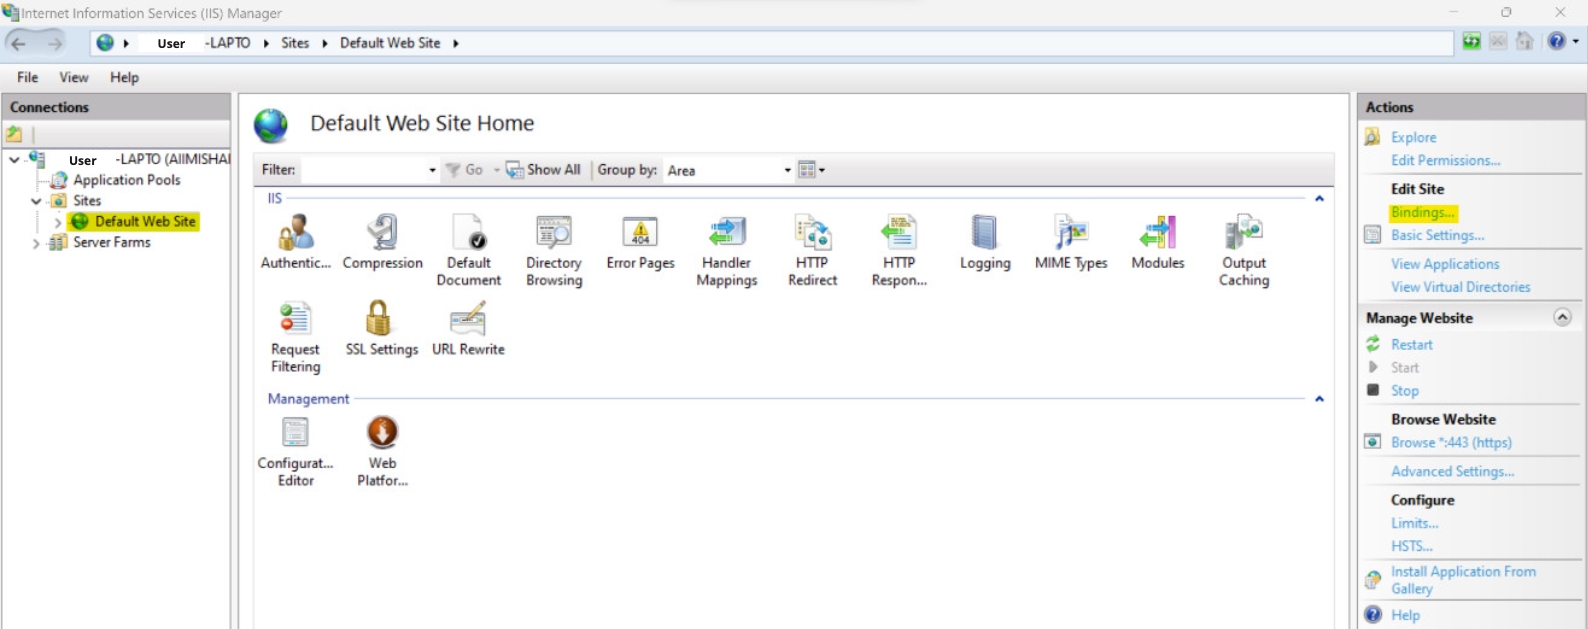
Select Bindings under Edit Site on the actions menu.
Select port 443 and select Edit.
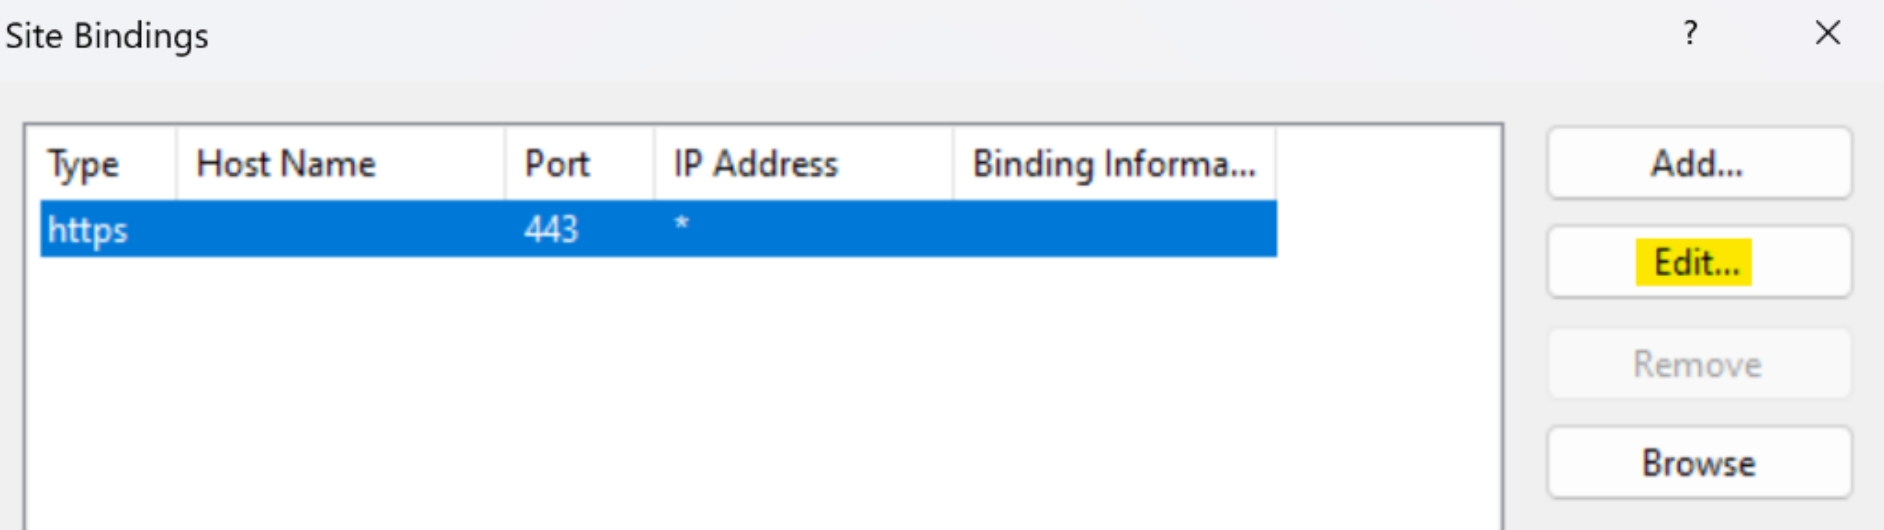
SSL certificate: Select the new certificate you created.
Open your web browser and navigate to https://localhost/#/login to check this is set up correctly.
If you see a blank screen it's possible the IIS didn't set up correctly. You may need to restart IIS.
Password Encryption
We recommend you encrypt your build. For help encrypting your build see our Installation Security area. Once you have completed those steps return to this guide.
Restart Agent Services
Run the following script to restart all the agent services.
Accessing Control Hub
Navigate to http://localhost/admin.
Login with your elastic username and password.
When you login for the first time you should see your agents on the configuration page. They will all be empty.
You can now close any PowerShell windows you have open.
Installing OData API (Optional)
Navigate to C:/Insightmaker/Apps/OData.
Open appsettings.default.json in a source code editor like NotePad++.
Check the following details:
The Plugins path points to the plugins folder. Likely C:\InsightMaker\Plugins.
The elastic certificate path points to the elastic-stack-ca.p12 file. This was created when you installed Elasticsearch.
The correct password is set.
The Elasticsearch credentials are set to the elastic login you created.
The prefix is set to the correct value and consistent across all components.
Add your two Aiimi Insight Engine licences to the root of the json:
"licenseKey": "your key"
"licenseSig": "your sig"
Check the remoteAddress is set to ‘http://localhost/analytics/‘.
Save this file, do not change the name or location.
Within C:/Insightmaker/Apps/OData open log4net.default.config.
Change the file paths to be where you’d like to save log files.
This can not be the in InsightMaker folder.
Save this file, do not change the name or location.
Remove the '.default' from each of the following file names:
'appsettings.default.json'
'log4net.default.config'
'web.default.config'
Open the web.config file.
Check the module is modules="AspNetCoreModuleV2".
Open Internet Information Services (IIS).
Navigate to the Default website.
Click add new application.
Alias - Enter 'analytics' as the name of this application.
Physical Path - Set this to the API folder within InsightMaker/Apps/OData.
You should be able to view the OData metadata document using localhost/analytics/odata/$metadata.
Last updated