
Relationship Map
Visualise the relationships and connections between documents and data. You can see how names connect to phrases, locations and concepts. This Removes the need to dive through individual results to find commonalities.
Accessing the Relationship Map
After performing a search, if any of your results have connections the relationship map lens will be available.
Select Relationship Map from the Lenses menu.

Accessible Relationship Map
You can use keyboard navigations to reach an accessible table of the relationship map.
Use the tab key to navigate past Min Results.
Select Show as Table option to open a table below the diagram.
First column: all entities and the entities they relate to.
Second column: the links to view the connected results.
Using the Relationship Map
Connected Entities
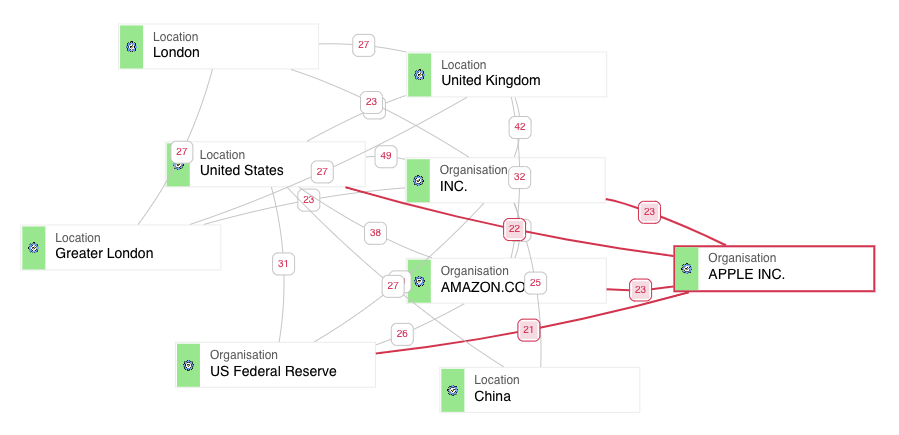
You can see every entity within your result and how they are all connected.
Select a label box to highlight the other entities it is connected to.
The line between each box shows the number of results that connect them.
Labels types have different colours within the box and an icon to distinguish them.

Common Items
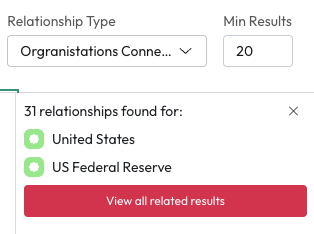
You can easily see the items connecting entities and view them all in a list. This allows you to quickly and easily find connected items.
Select the number or the line connecting two boxes.
A relationship panel will open with the number of results connecting the two entities.
Select 'View all related results' to see all the related results in a list.
Minimum Results
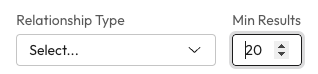
You can choose the number of related results that must exist for a connection to appear in the diagram. For example; if the Min Result is set to 5, any entities with 5 or more items connecting them will appear.
Select the Min Result field.
Enter the minimum number of results between a connection you want.
Increasing this number will give you fewer results with stronger connections. Reducing this number will give you more results with weaker connections.
When you change the number the diagram will automatically update.
Relationship Type
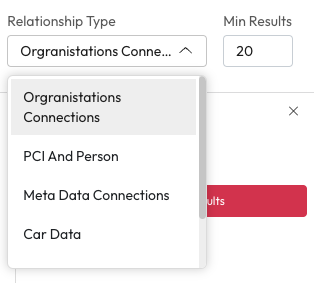
Find different types of connections using the Relationship Type dropdown. Each relationship type will look for specific entities.
Select the Relationship Type dropdown.
Choose a type from the dropdown menu.
You can change your relationship type at any time and it will update your results.
PCI relationship types may consist of entities like Card Numbers, CVVs, and Bank names.
Organisation types may consist of organisation names and locations.
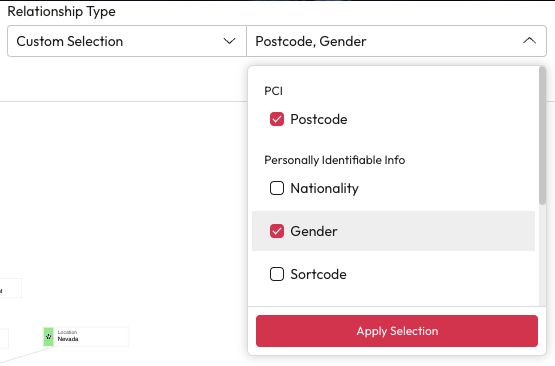
Custom Relationship Types
If you can't find the connection you are looking for you can create your own. Any custom types can not be saved for future use.
Select Relationship Type.
Select Custom Selection from the menu.
In the next dropdown, select the attributes you want to find a connection for.
Select Apply Selection.
Last updated